When you operate as a highly frugal seamstress, you naturally begin to develop a variety of tricks and penny-pinching measures for saving money and cutting corners when sewing.
As part of a new series on my blog called Spartan Sewing, I’d like to share some of these tips with you!
Having a lust for 1950’s fashion means that it’s often difficult to stay on-budget. With select vintage sewing patterns reaching $200 in price (value is debatable…), what’s a Spartan Seamstress to do? One way that I cut corners in this area are buying incomplete patterns (missing inane little things like facings or rectangle pattern pieces for skirts that I can easily draft myself, or whatever), patterns with obliterated envelopes, or even patterns with missing envelopes (like most vintage mail-order patterns come nowadays)! But then I have this little misshapen plastic bag in my drawer with random pattern pieces inside and is a complete nuisance to organize.
It hit me like a bazooka: I’m an anal-retentive graphic designer, I really shouldn’t be having these kind of issues!!
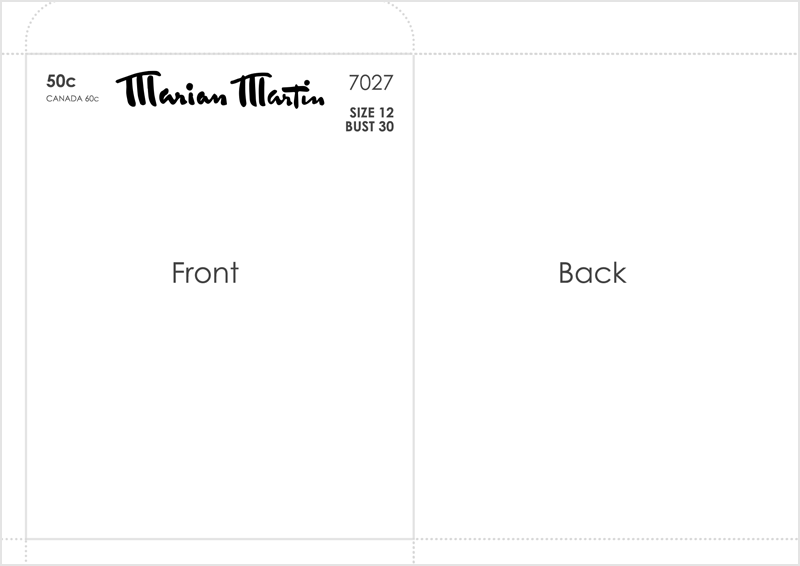
I decided to try my hand at creating my own pattern housings from A4 pieces of paper, but I was frustrated and disappointed with the amount of envelope templates from A4 sheets available on the web, which is why I decided to create my own and make them available to you today as a free PSD (Photoshop) download! This is what it looks like:

But wait, there’s more! (I feel like a dodgy salesperson)
I have also included fully scalable vector logos within the file of some of the most popular sewing pattern brands, free for you to resize and position on the pattern however you’d like (whether you want it at the top or running down the side, or on the back too, but smaller, etc etc). The brands are:
- Simplicity
- Butterick
- McCall’s
- Vogue
- Advance
- Marian Martin
- Anne Adams
All the text is editable, so you can just substitute the numbers to match your pattern, delete and re-position wherever you want. The font I’ve used is Century Gothic which happens to be the best font in the world and if you don’t have it, you ought to get it.
Steps to making your own pattern envelope:
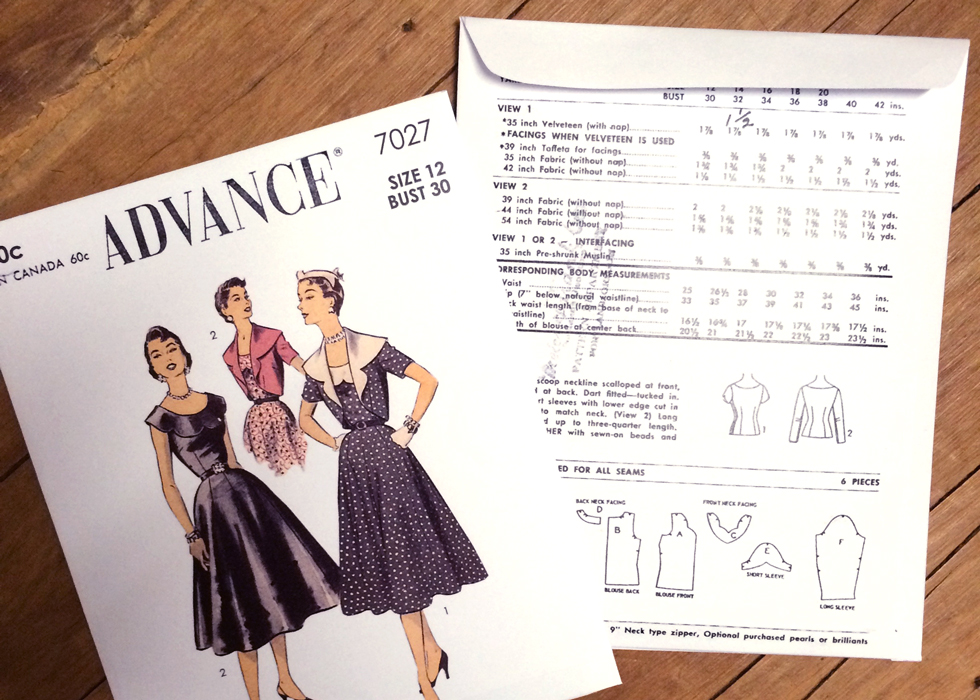
- Source high-quality images of your pattern online. Go and Google it. Here is the Etsy listing for one I recently used, Advance 7027. Etsy has the ability to save large, high-quality images from sellers so sourcing them from there is a good idea if you can. Just click on the “zoom” link under the bottom right of the images and check how large they are. Smaller than the one I linked? Look elsewhere.
- Bring the image of the front cover into Photoshop and cut out the illustrations on the front using the polygon select tool (don’t even think about using the Magic Wand..). To soften the edges to be less angular, go to Select -> Modify -> Feather… (SHIFT+F6) and pick a low number, like 1 or 0.5. Now CTRL+X and CTRL+V onto the front section of your template. You can adjust the curves (CTRL+M) and colours if you need to.
- For the pattern details at the back of the envelope, roughly select around just the text area and paste it into the back section your template. Scale to fit (try not to scale up too much or it’ll be blurry). You will want to desaturate this image (since it will undoubtedly be an aged yellow colour) and adjust the curves until the background is pure white. (Tip: On the curves graph, see how there’s a diagonal line? Grab the end at the top right and move it left until the background disappears. If the text is too light, click in the centre of the line and drag down a bit until it’s readable).
- This is a bit of a no-brainer, but change the text on the front section to reflect the details of your own pattern.
- Print. Absolutely no auto-scaling allowed. The only thing that should be getting cut off by your printer is parts of the cutting guidelines, but it doesn’t take a genius to draw them back on if you really require them.
To download, click on the link below:


8 Comments
We would like to subscribe to your email newsletters, please.
[email protected].
Thanks,
Lorili Design, Inc.
Sorry, I don’t have a newsletter x
This is great, thank you!! This series sounds very interesting, I’m looking forward to the next articles. Being a student still, my budget is also limited, so I’m curious to read your tips and tricks!
Hopefully I have enough to fill a series! (And the motivation to continue blogging about it, haha)
I can’t believe I didn’t think of this! I have some of my vintage patterns in plastic sleeves with the covers photo copied, but this look way cooler!
Just another way of organisation! Plastic sleeves work, but I like my little illustrated envelopes a lot too (except when the pattern is too big to fit inside, eeeeek).
Demi, you are my demi-goddess and I am in awe of your amazing talent and generosity!
No problem at all! You can show me photos of your envelopes when you make them up, I’m sure you’ll be making some stunners! :)