Today we’re going to delve into the world of DIY.. There are plenty of tutorials on this particular matter and while I got the idea from SoccerMomStyle, of course I had to do things my way!
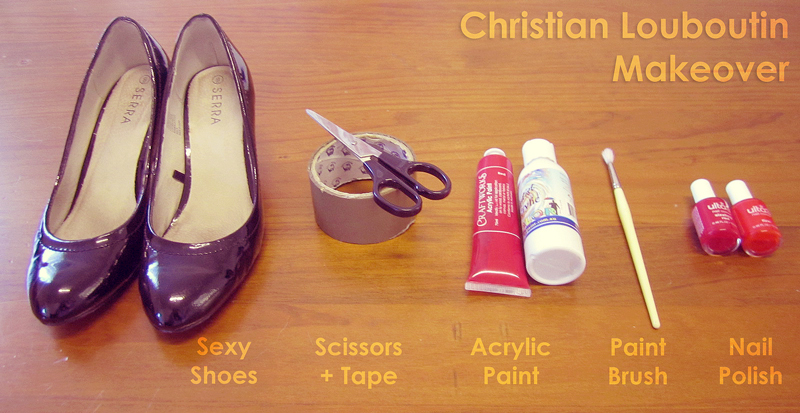
Firstly, as you see in the picture above, for this project, you’re going to need some sexy shoes of any description (nude and black works best IMO), and the heel should be as high as possible. This is purely because I found you can barely see my handiwork in these modest heels and it would have had a higher impact on 10cm+ heeled pumps!
I don’t own such pumps, I mean, I can barely walk in thongs.
Secondly, you’re going to need to tape around the edges using a tape that won’t damage your heels so the paint doesn’t get onto parts of the shoe you don’t want paint. This is a pretty important step as I found out later on! I used masking tape but it seems to have gone walkabout as I couldn’t find it for picture purposes.. I probably should have used a stronger tape though, as it started to peel off mid-way through the painting process, resulting in a messy finish. Tape it on FIRMLY!
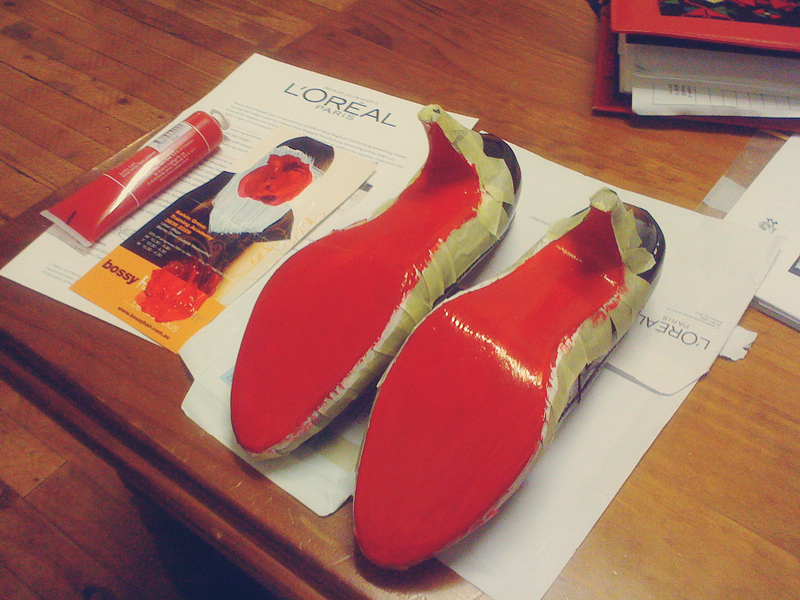
Thirdly, your paints. You’re going to want to pop into Crazy Clarks and buy some $2 bottles/tubes of a bright red and white acrylic paint. Chuck in a brush with that if you don’t have one. Delicate brushes not needed because of the tape so use whatever you think will be the easiest for you. The amount of coats will depend on what colour the sole already was. My soles were black, which meant that I needed 3 coats of white paint and drying time between each coat to ensure an even finish for the red colour.
This is a very important step; you have to make sure that the white coats dry thoroughly before starting on the red. Wait a day or two if you must but DO NOT START PAINTING WITH RED UNTIL THE WHITE COATS HAVE DRIED. Obviously you can ignore that if you have nude soles. With nude soles, you can start straight away with the red paint.
These shoes needed 4 coats of red paint because I did not let the white paint dry 100% before I started applying it. This meant that it mixed with the white, made it wet again and the white turned pink. It was a mess. I would estimate that you’d need 2-3 coats of red or whatever you need to cover the soles entirely.
Fourthly, and this is only applicable if you’re an idiot like me and didn’t get an even finish, you can break out the nailpolish. I initially used sizzling red, but it was slightly darker than that bright Louboutin look that I wanted so I covered it over again with a more orange-red called “Fire”. These nailpolishes were pretty cheap—$2 at any pharmacy. All my hard work resulted in the perfect colour!

Fifth and last step is removing the tape. Do this only after you’re sure everything is dry and do it carefully so you don’t damage the shoes. Because my tape was weak and flimsy and I didn’t press it on firmly enough, there was a bit of spill over the sides, so if you’re a numpty like me, just take a sharpie and colour over the bits you missed. If you’re doing this with nude pumps, you’re a little bit stuffed and you should have put the tape on more firmly!
DIYing is the ultimate bargain tool, and it’s not always costly to do either—the paints and polishes cost me $2 a pop, I got the brush out of my makeup box (what makeup box??), and the shoes were $20 from Aldi. You can buy similar shoes (but with that all-important higher heel!) from The Iconic for around $25 (after the discount codes I used a few posts ago!), and the nude sole will make it a lot easier for you too.