
How is this not already a tutorial? I really don’t know.
I’m always searching for unique details to add to a dress, something authentically vintage but also screams “nobody else will have something quite like this!” and loop pockets fit the bill perfectly. They’re not always practical to add to a garment, but for flared or circular skirts, they really add just the right touch of whimsy–and they’re hella useful as well (depending on how big your pocket bags are).
For this tutorial, it’s important to note that because you will be slicing into a skirt from the waistband and sewing things with seam allowances, that your front skirt piece must be slightly bigger at the waist–just to the tune of 4 seam allowances.
This amount is potentially less if you decide to add piping (it’s purely optional, you can make loop pockets without piping) because piping itself adds a little bit of thickness. So say your seam allowances are 1cm wide and your piping is 0.5cm thick, instead of adding 4cm (4 seam allowances worth), you’d only be adding 2cm of additional seam allowance (4cm – [0.5cm x 4] = 2cm). Confused yet?
I got into trouble with this dress when I first made it because I completely forgot about the seam allowances on the pockets, so it sat in my WIP pile for over a year, skirt pieces all cut out but being too scared to add pockets, knowing it wouldn’t fit me. I then miraculously lost enough weight to cut into it and add pockets, but then also had to add darts to the bodice and the overall fit ended up a bit meh. I will be completely prepared next time around though and I wanted you to be too!
So let’s begin…
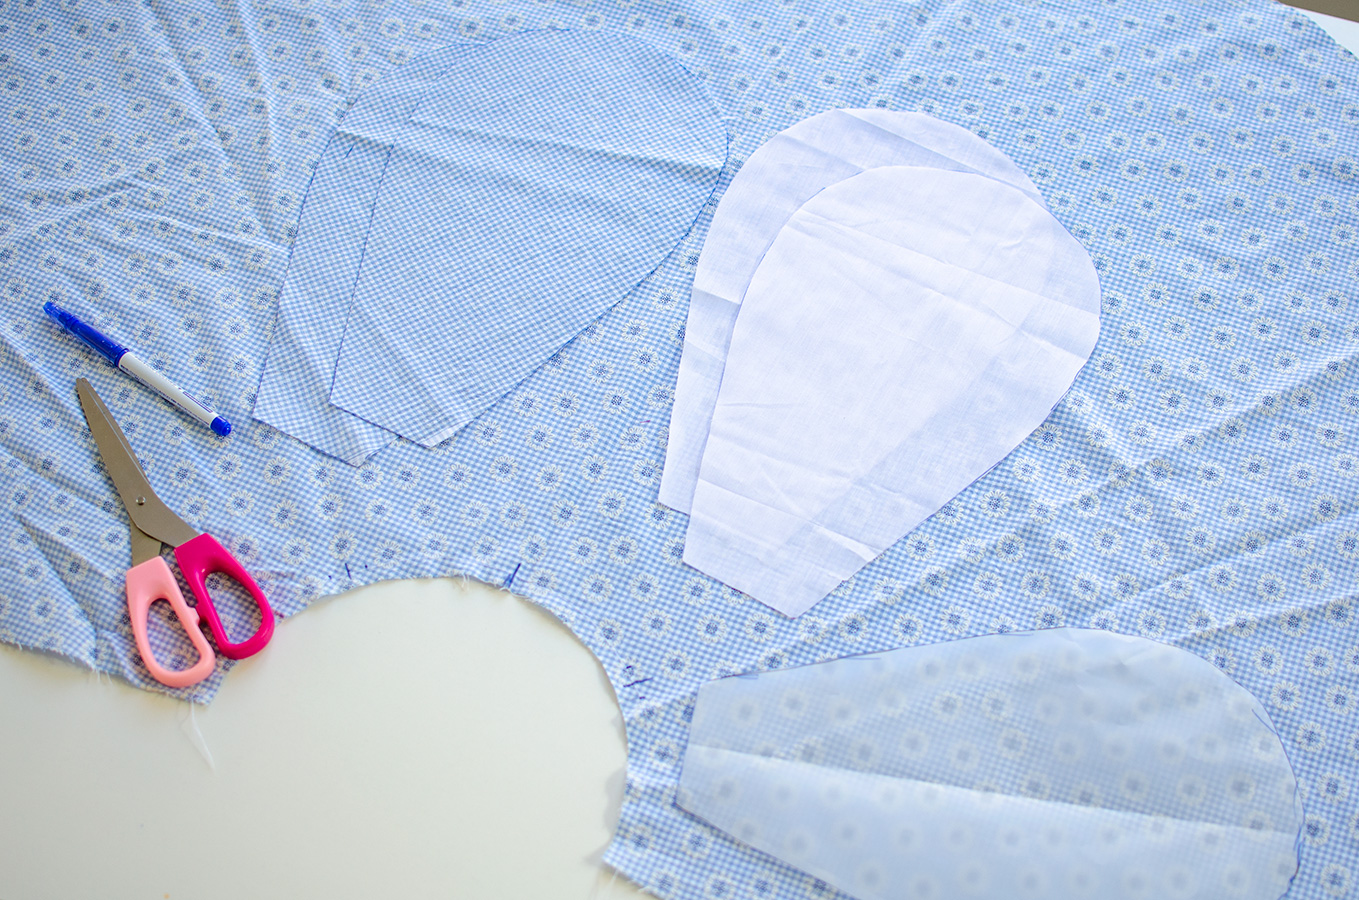
What you’ll need for this tutorial is your skirt (duh) and two sets of identical pocket bags, which will be sort of teardrop-shaped, as above. Two of these will be visible, and the others will just be the facing, so make sure you plan accordingly. Trace around your hand and partway up your arm to make sure that you will have enough room for seam allowances and snacks, etc. My pocket bags are about 30cm high.
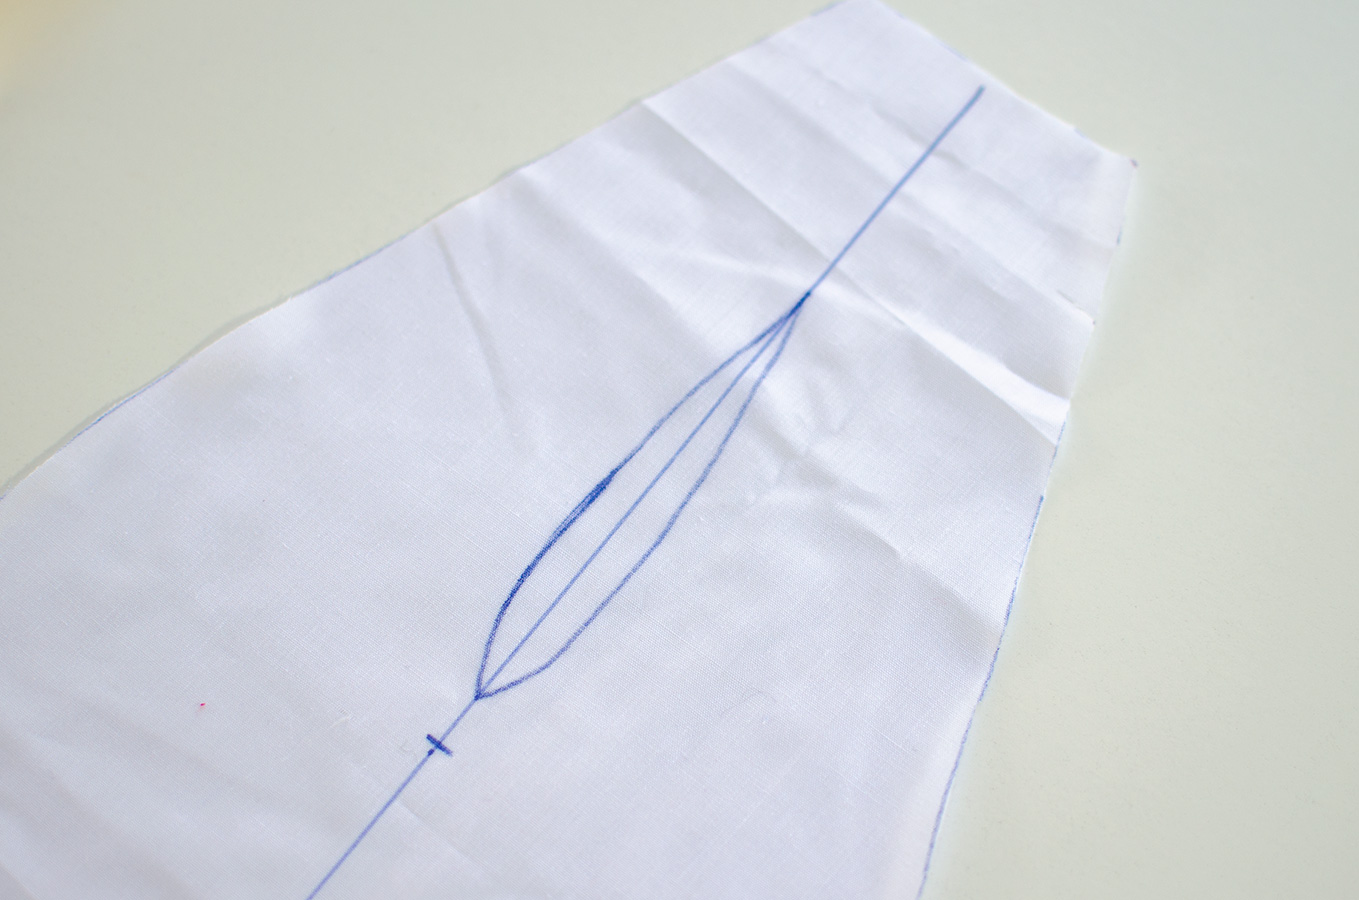
Now on your FACINGS (the fabric that won’t be visible), draw a mark that splits the fabric vertically in half and make a mark about halfway down. Draw a long teardrop as shown but don’t make it too big and don’t start it at the very top–this is just your cutting line. Because of seam allowances, the hole will end up much bigger than this. If it helps, you can mark the cutting line and then the seam allowance around it to better visualise it, but I only have the cutting line marked below.
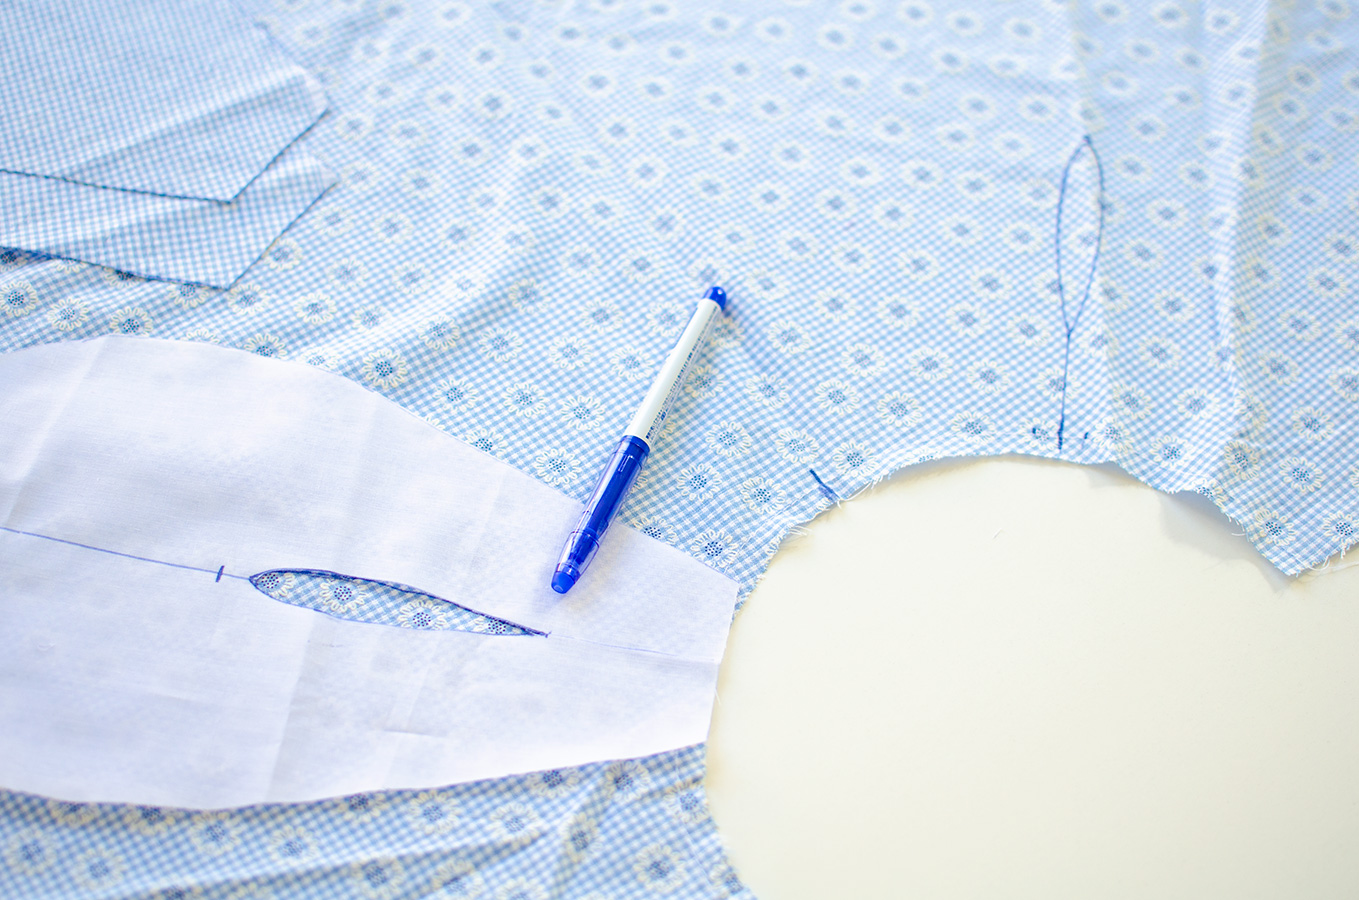
Starting at the top of the pocket, cut out the teardrop at the cutting line. You can use this to now trace onto your fabric. A good position for your pockets is in quadrants, so halfway between the middle of your skirt and the side seam.
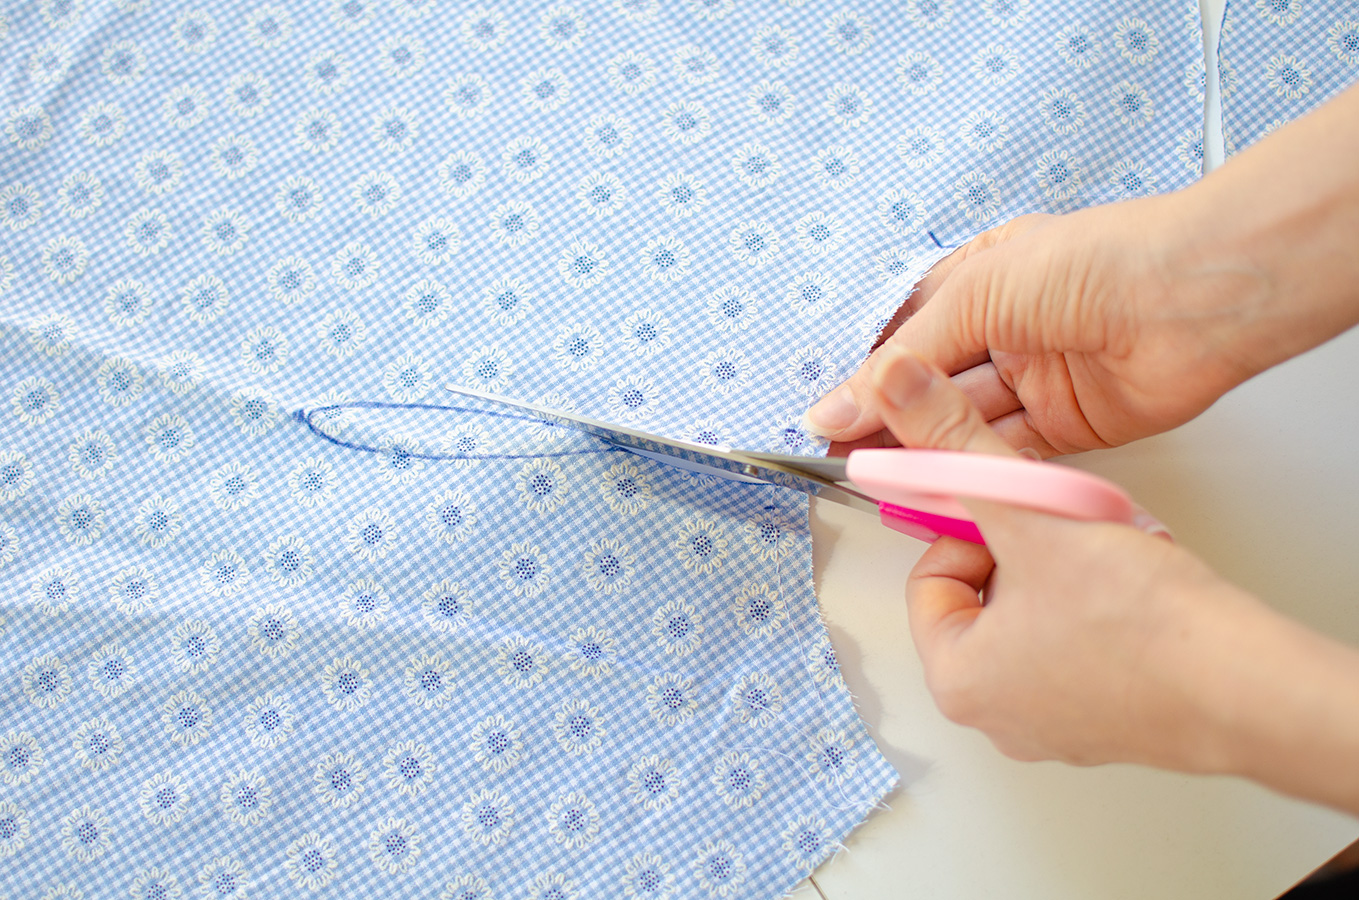
Carefully cut out your marked teardrops from your skirt, making sure they match your pocket facings and each other (don’t make one longer than the other!).
At this point, you sew the piping onto your pocket in your preferred manner. I will assume you know how but if you don’t know, just Google, there are many good tutorials. Eventually I’ll write a tutorial on how I do it, because as usual, I have my own method.
Pin (or clip) your facing to your skirt, right (good) sides together.

Carefully stitch from one end to the other, following your seam allowance, or, if you’ve added piping, just sew over the stitches you used to attach your piping!

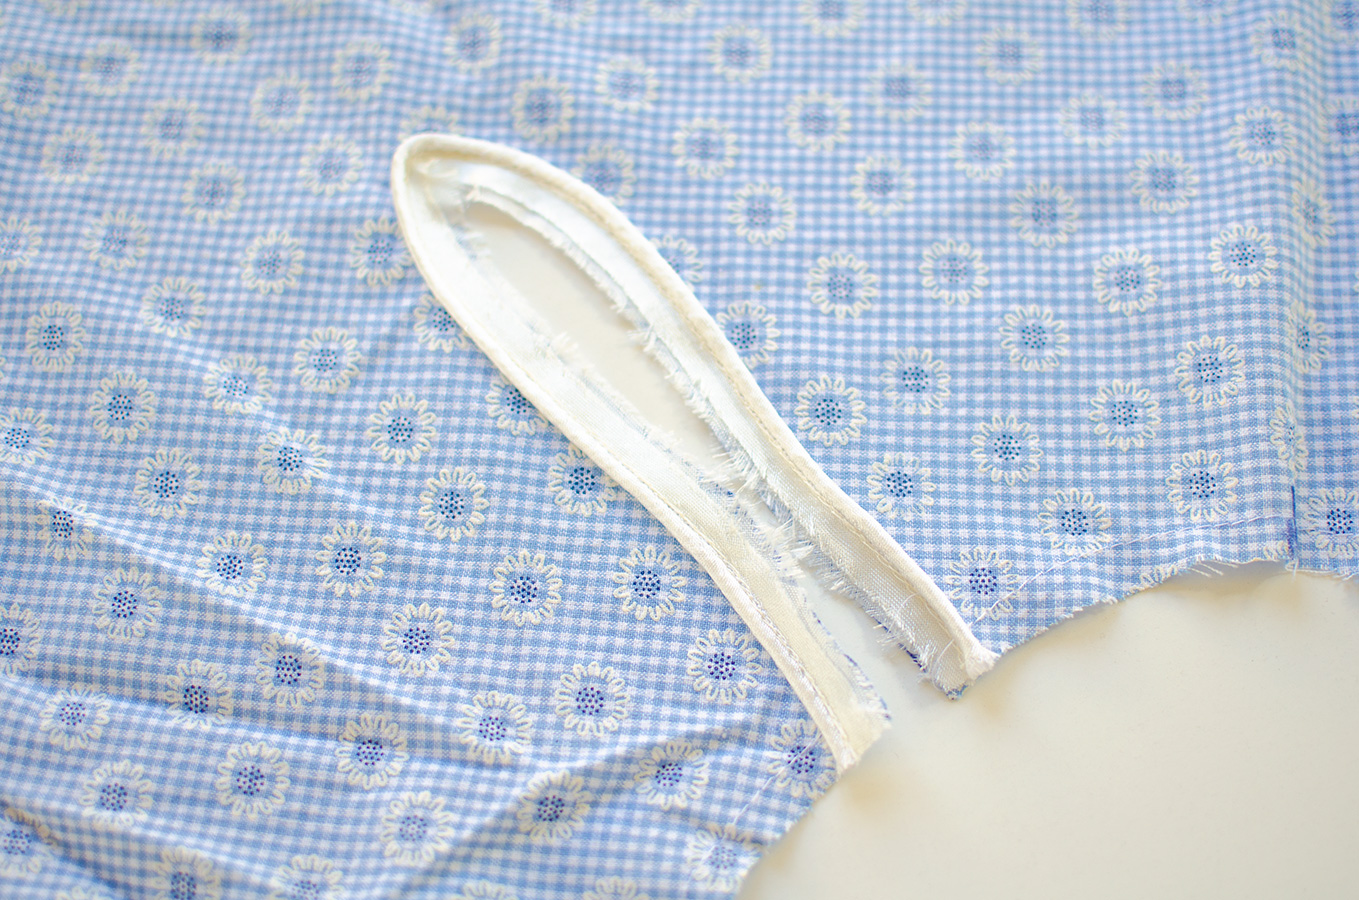
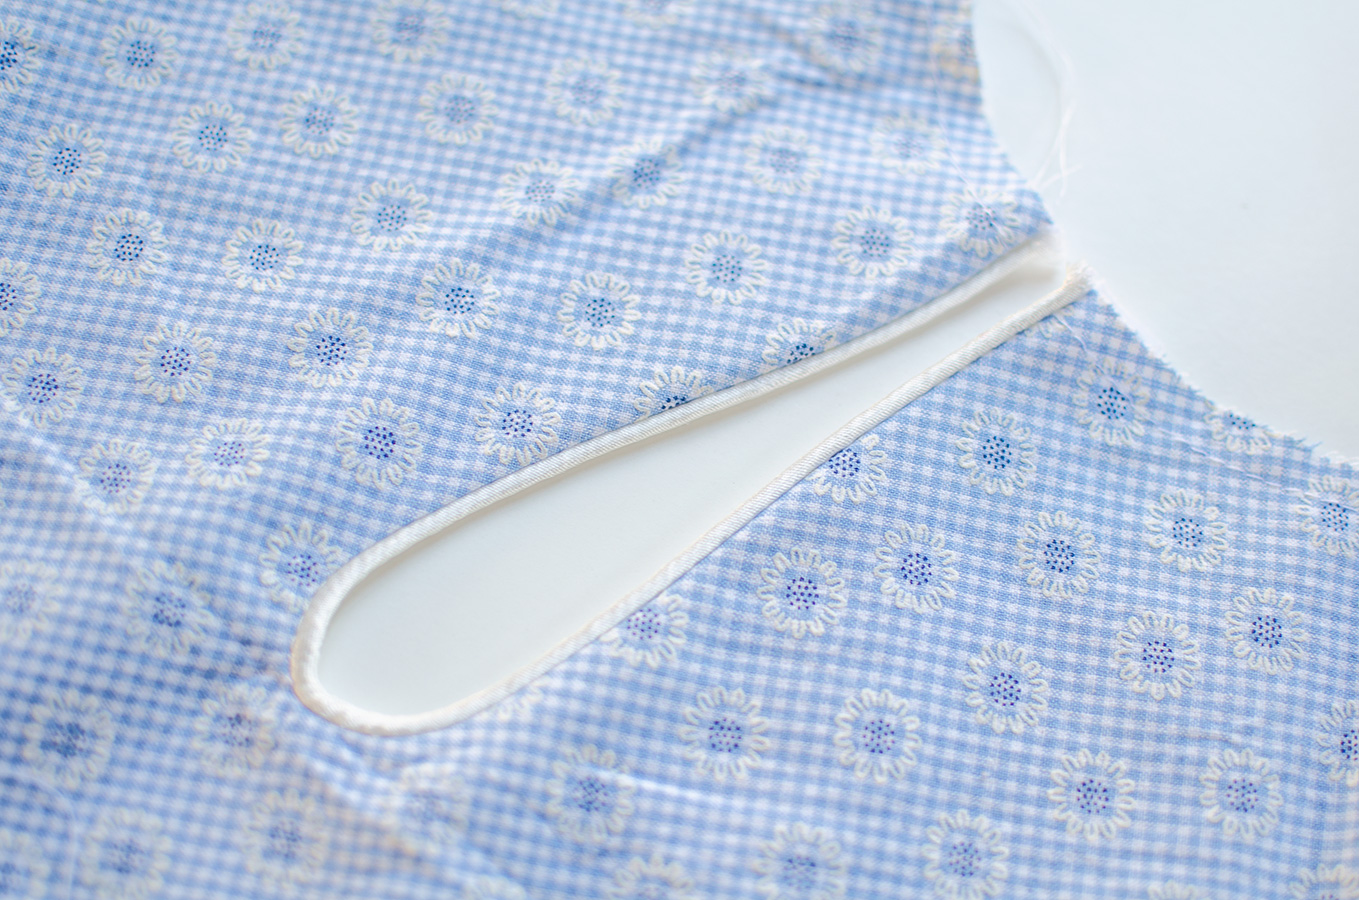
Once you’ve sewn your facing in place, clip off the seam allowance carefully with a pair of pinking shears. You can just notch and snip into the seam allowance at the curves, but pinking shears are my go-to for reducing the bulk of seam allowances. The better you do this, the more likely you’ll end up with a nice, neat loop.
Flip your facing to the inside to expose the piping and voila! You can see why I suggest adding extra to the circumference of your waist, but not as much if you’re piping–the piping adds a bit of fabric to the areas we’ve taken fabric away.
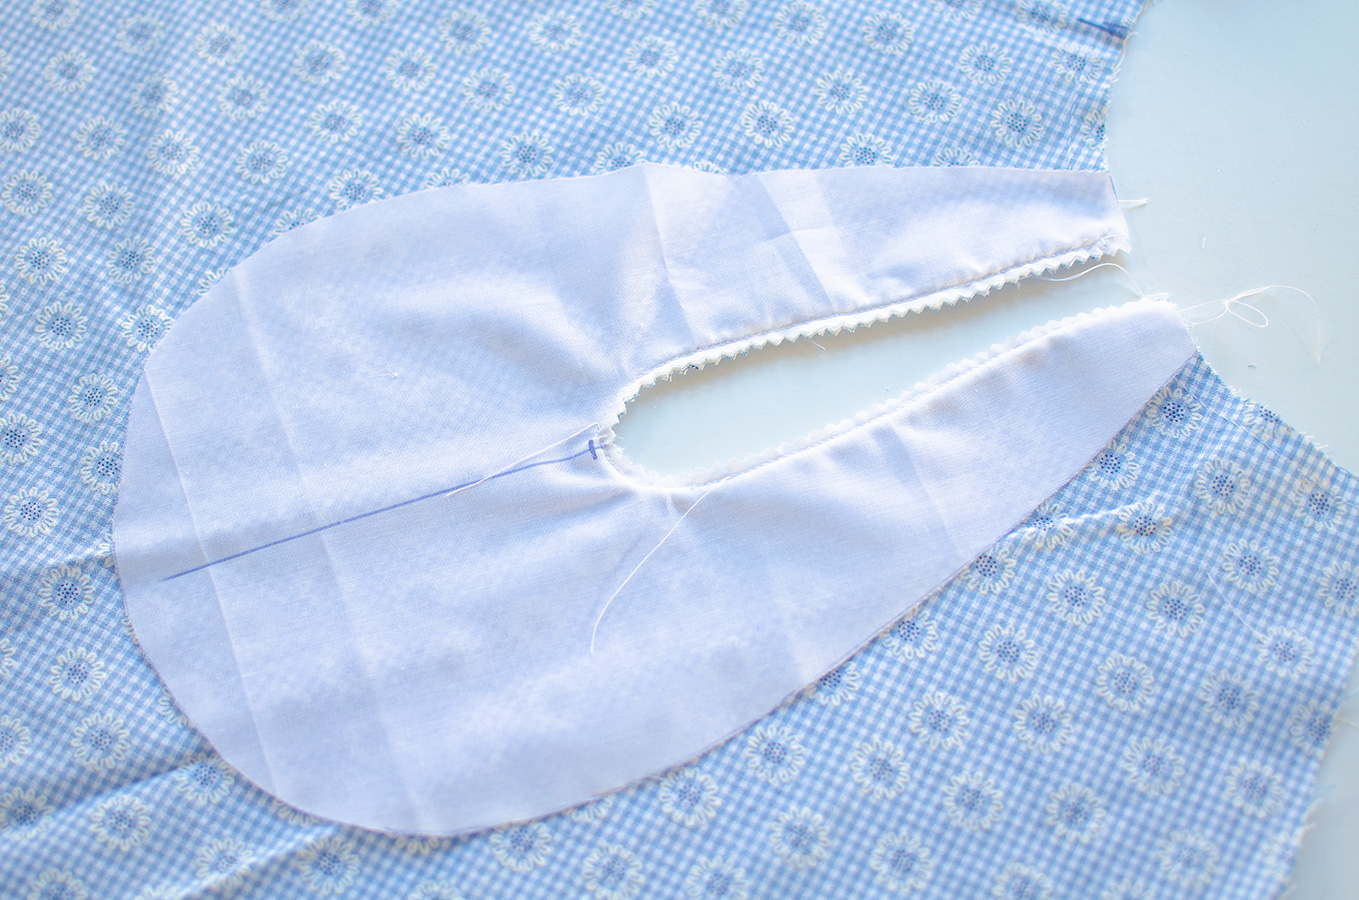
So once you’re done pressing your seams and admiring your handiwork, flip your skirt over so you’re looking at the inside. Now get your visible pocket lining and apply it face down against your pocket facing, matching the edges of your pocket facing to the pocket lining.
Stitch or serge around the edge, making sure you’re just sewing your pocket facings and linings and not interfering with any part of the actual skirt.
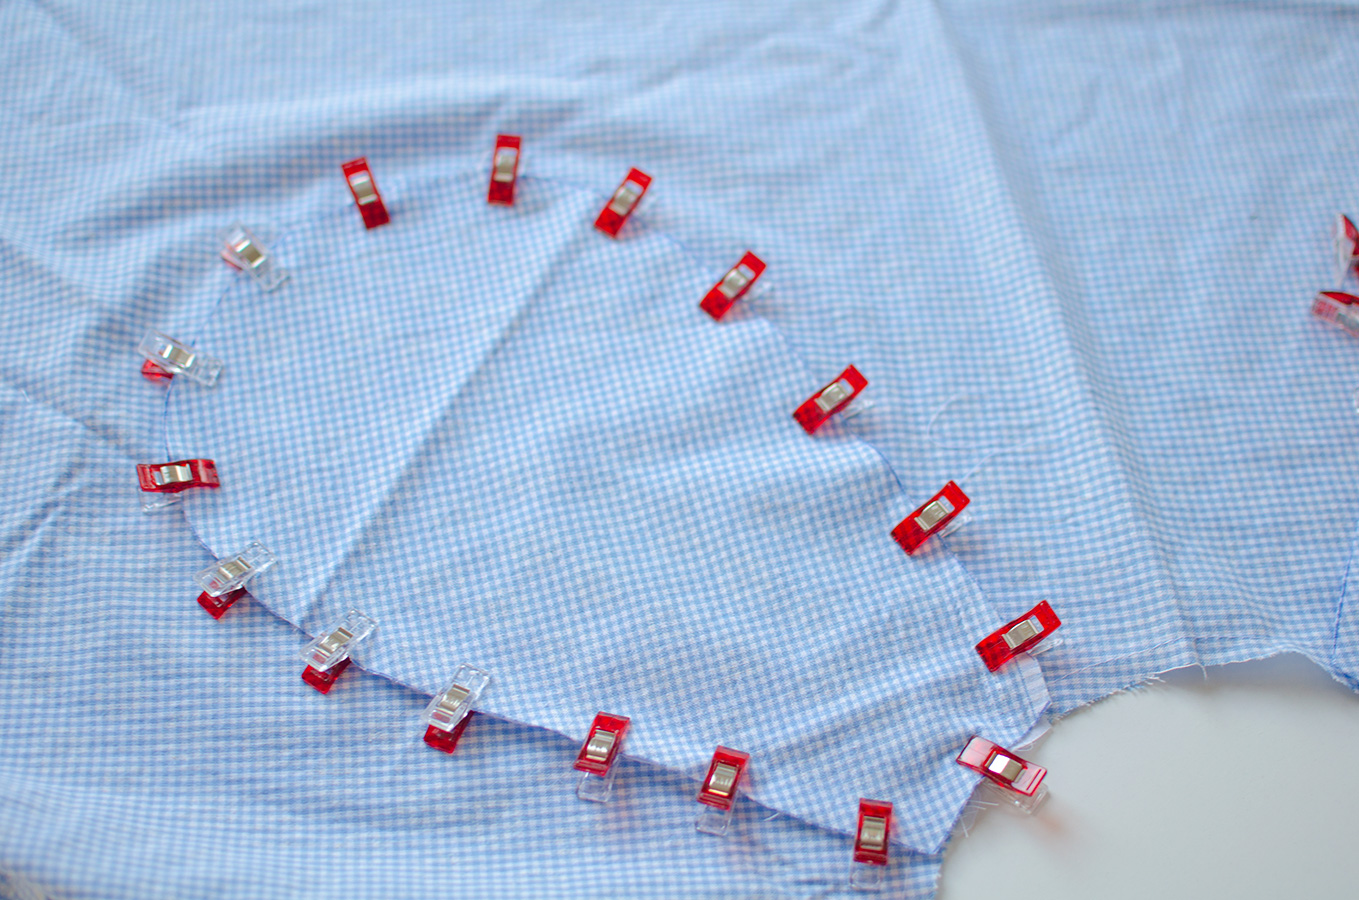
When you flip it over again, you should have a nice loop pocket. Baste the top of the pocket together (through all the layers) with your machine to make sure it doesn’t flap open when you’re attaching it to your waistband or bodice and you’ll be set!
