Welcome to How-Tuesdays! Hur hur. Today we’ve taken our inspiration from the Cambridge Satchel Company’s neon line that everybody worth knowing is toting around. Neon is pretty hot right now, and while it’s difficult for me to envisage myself wearing a top or a pair of pants in this uber-saturated tone, I thought there was no harm in experimenting with a few neon accessories to brighten up my look!
In addition to neon, the chevron pattern is also getting hit pretty hard on the runway right now, so what else could I do but combine these two trends into the one DIY? This project is definitely not for beginners and you need a steady hand for this one! (And good tape, dammit)
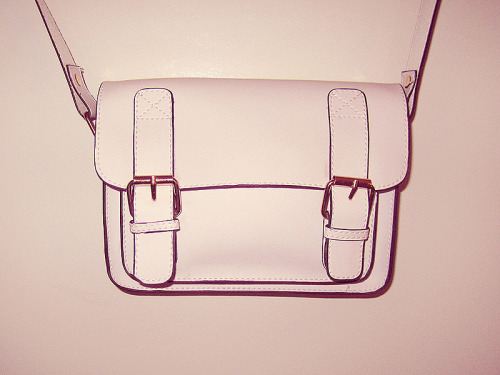
Step One: Get your bag prepped and cleaned in anticipation for this project. Get rid of all the smudges with a little nail polish remover, but don’t rub the black edges too hard or they will come off–it’s only rubber! I bought mine from eBay for $8 but then they decided to raise the price so you’ll have to pay a little more, but it’s so worth it!
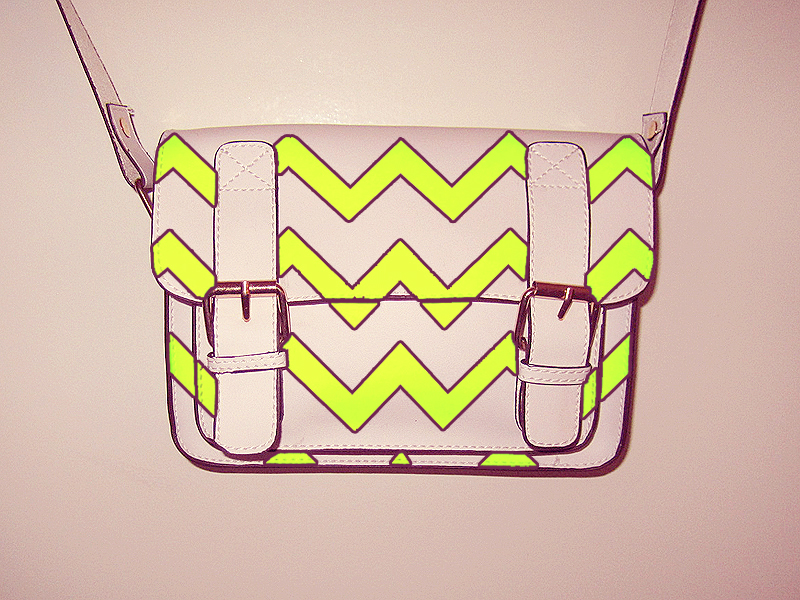
Step Two: Take a photo and fiddle around with it in Photoshop to get the pattern you want. This might not end up as your final design, but it’s good to have an idea in your head about how you want things to look on the final product.
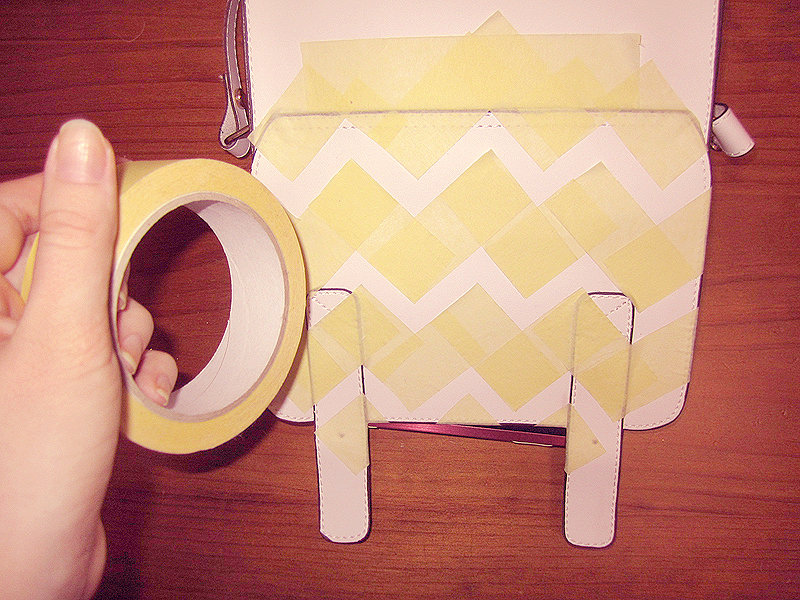
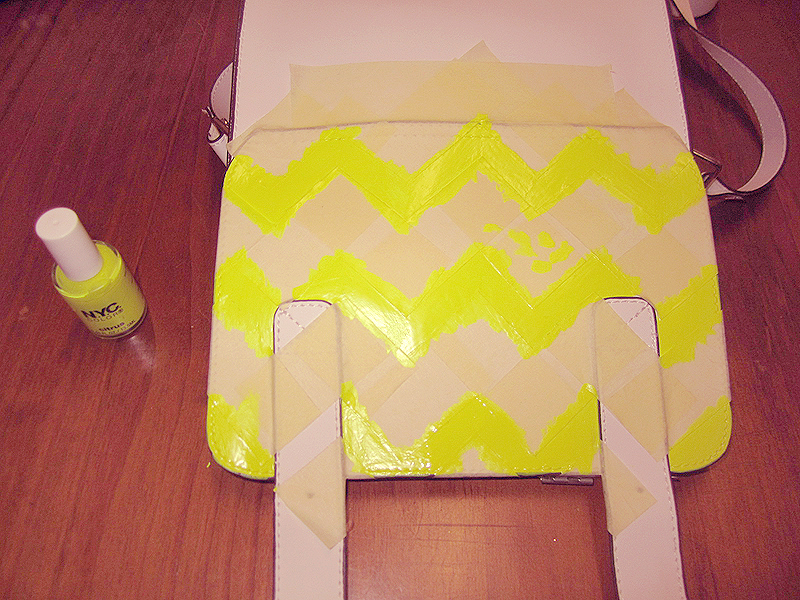
Step Three: Get your tape (make sure it’s good tape, I keep repeating the same mistakes by using this crappy painter’s tape and then the edges lift and I create a mess that takes a while to fix) and stick it on the areas you don’t want to paint. Push it firmly down!
Step Four: Get something hard, thick and flat to lay underneath the flap of the bag so you have something solid to work under. I stuffed this bag full of scarves to make it more solid and used my framed photo of Bruce Willis to support the flap.
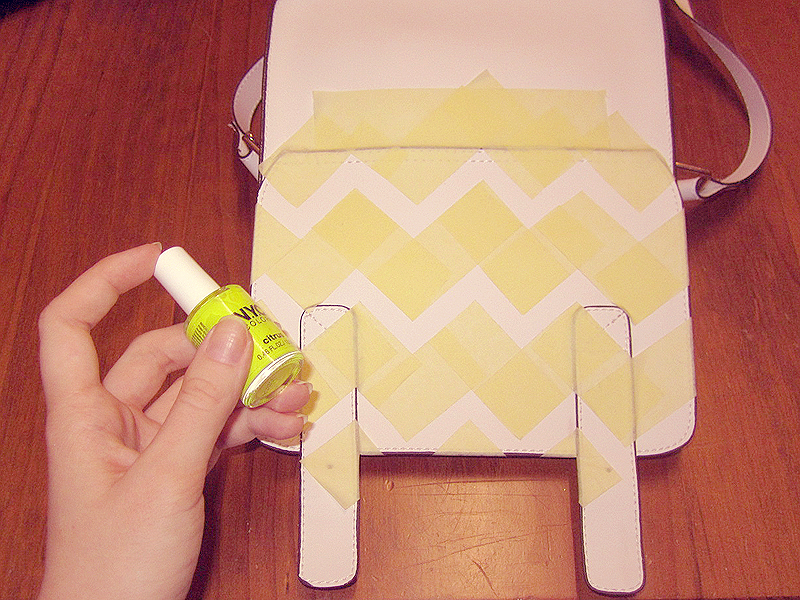
Step Five: Get your nail polish and give it a good shake. For this project, I bought a NYC/Ulta3 “Citrus” colour for $2. It’s available at Terry White Pharmacies, generally, and as cheap as chips.
Step Six: Paint the relevant areas. For an even coverage, you’re gonna want two coats. Make sure that the nail polish is completely and utterly dry before taking off the tape or you’re gonna end up with the edges of the painted pattern lifting up and drying like that (like what happened to me!).
When you’re taking the tape off, peel it off in a parallel motion to the direction of the paint. So for example, if your pattern is a vertical line, peel the tape vertically down/up. Nail polish is a bit tricky to work with because it tends to fall off in large chunks, so this will prevent chipping from your pattern. If your pattern has leaked under the tape, get some nail polish remover and wipe from outwards in to the colour. You might end up getting rid of more than you want to, but you can repaint that by hand immediately. If you smudge yellow onto the rest of your bag at this stage, it’s going to take an hour with a Q-tip soaked in nail polish remover before you can get the yellow staining off the parts that are meant to be white. You know, I’m guessing, because I wasn’t silly enough to do this myself. I swear.
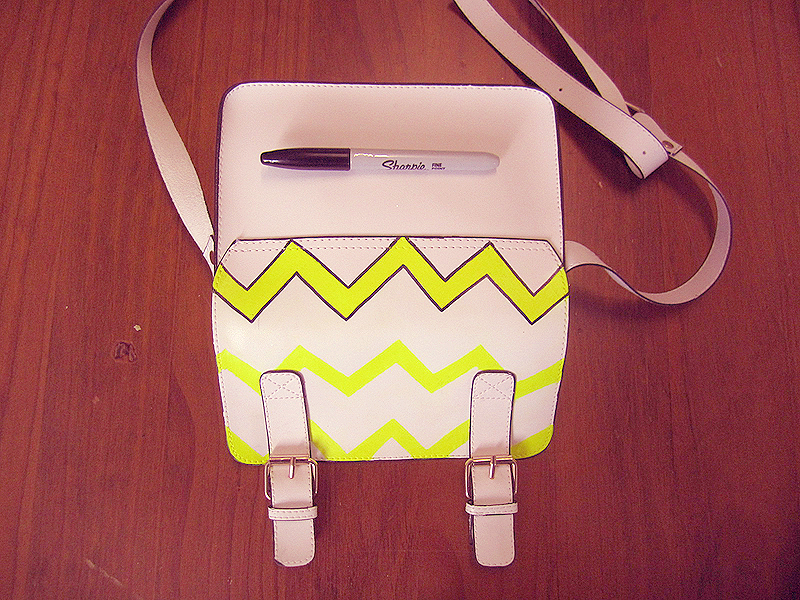
Step Seven: If you wanna go this route, you can outline your pattern with a sharpie. Be very extremely careful about this because as I discovered only a billion times while painting this bag, it smudges with the smallest bit of pressure, so keep your hand off the bag while you’re on this step. You can clean it up with nail polish remover if you screw up, but at this stage, it’s going to take a lot more to fix the mistake, so.. try not to!
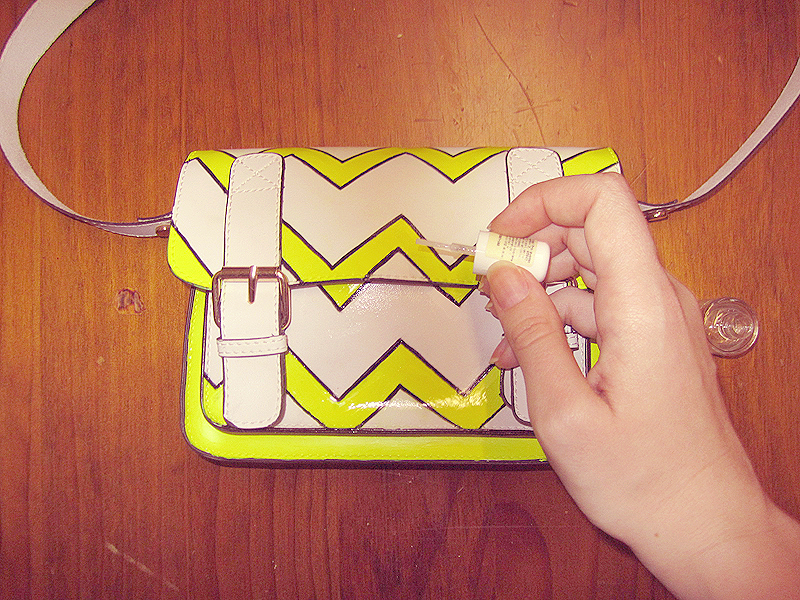
Step Eight: The sharpie will smudge for an infinity amount of time after you’ve put it down, so after you’ve waited a day or so for the sharpie to dry as much as it possibly can (wishful thinking right there), you’ll need to go over it with clear nail polish. Do this with one stroke per line and clean the brush every time you go down because it’s going to get dirty quick and prone to smudging the rest of your artwork! After you’re done with the lines, you can go over the citrus-coloured areas to smooth out the paint a bit. Clear nail polish is a good way to smooth over the texture of the paint.
Step Nine: And we’re done!
Don’t be fooled by this tutorial, it’s not for the faint-hearted. You’re gonna make a lot of mistakes with it and screw up a million times, but it’s gonna look pretty awesome in the end and you’ll barely be able to see those mistakes unless you’re looking at the bag right in front of your nose. Pair this bag with a few neon-coloured statement pieces and you’ll be styling.
I hope you all had fun with today’s tutorial and that it inspired you to make your own one-of-a-kind neon satchel!




8 Comments
Love this cute satchel and even at $12, it’s a steal. I just bought the white version today and I’m thinking of experimenting with neon when it arrives to match with some shoes I just bought in the Forever New sale ($60 shoes down to below $14!)
Keep up the great finds! I really appreciate someone who can source inexpensive fashion items on ebay, because I often find this a challenge.
http://adventuresofalba.blogspot.com.au/
Woah very cool savings! Sadly I haven’t worn this satchel that many times because I don’t really have the wardrobe for it, but I’m thinking of selling it on when I finally open up my blog shop :)
Thank you so much for the compliments–everyone can be their own online frugalista, it just takes practice, like everything else in this life ;)
I’m just wondering whether you will think that the nail polish will crack with the movement of the leather?
I have used black nail polish before to touch up scuffed heels :)
With ordinary use of the bag, it’s not cracking. I wore the bag today and it was fine, no cracks even on the top of the flap where the paint is sort of wrapped around the leather. However, to test for you, I bent a corner very sharply against itself and the paint did crack but it didn’t fall off and I just added more clear nailpolish to seal the crack over from the test, haha.
For convenience, I used a $2 bottle of neon nailpolish, but if you can find neon acrylic paint (and it’s quite difficult to find in my experience!), I would definitely recommend that over the nailpolish because it’s more flexible.
(I use black nailpolish on scuffed heels too, hehe–it has like a million uses!)
Love it! Such a good idea… Very creative!
Thanks Miss Megs!
wow – love it! Looks amazing. Might need to investigate buying a satchel bag…
They’re very hot right now ;)
I’m also considering painting over one of my old statement necklaces with the same neon hue to match with the bag! Have you seen the prices of neon jewelery in stores?? Crazy.