
Hey guys! I said there would be content inbetween these sewalongs so I’m sorry I missed that last week, we had a camera malfunction. :(
I did a gathered skirt tutorial once (a long time ago). I was new-ish to sewing and wanted to show “See, if I can do it, so can you!”. I look back at that skirt and grimace a bit now. I don’t delete it because it’s helped some people, but I have definitely picked up a few neat things since then from various gathered skirt experiments I’ve done, and will hopefully pass those tips along to you to remember for the rest of your life. Conversely, if you have any tips YOU want to share, please feel free to comment below and share the collective wisdom. I have no illusions about being the best seamstress in the world, I’m just as happy to learn as you are (hopefully)!
One thing to remember about gathered skirts is that they’re fundamentally rectangles. People get very scared to draft their own rectangles for skirts when they really shouldn’t be. It’s one of the simplest things you can do as a new sewer, and I don’t hesitate recommending a simple gathered skirt to newbies. Once you learn how to draft them yourself, using pattern pieces for gathered skirts from patterns you buy will seem absurd.
As usual, if you’re here from Facebook, welcome! And if not, please feel free to join us in the B6413 Sewalong group and post your works in progress, finished dresses, or even if you want to complain about my crappy instructions ;) Freely use the hashtag #b6413sewalong if you don’t feel like joining yet another Facebook group.
Measuring
Measure from your natural waist to where you want the length of the dress to hit you on your legs (or just measure a preexisting skirt you own for simplicity’s sake), add a regular seam allowance to the top (5/8″ or 1.5cm) and add seam/hem allowance to the bottom.
How much seam allowance you add to the bottom depends on how much fabric you have and/or how deep you like your hems. I’m always squeezing dresses out of scant amounts of fabric so often my hemlines are very narrow, but it results in a nicer finish to do a deeper hemline, especially if you want to stitch an invisible hem. It’s not impossible to do an invisible hem with a tiny seam allowance but it’s not very pleasant to do either.
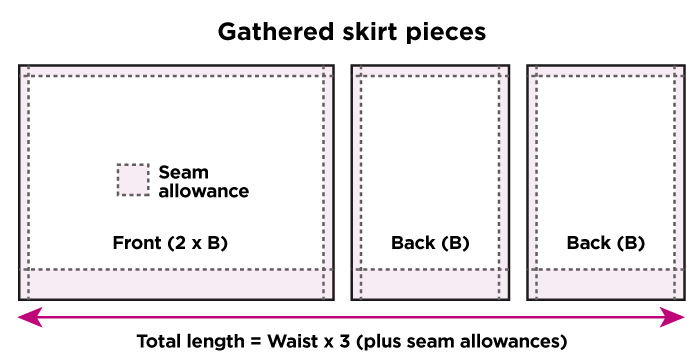
Anyways, for the width/fullness of your skirt, a good rule of thumb is three times your waist measurement. I am incredibly lucky that this number ends up at about 2 metres/yards for me, which means I just round up and use two whole widths of fabric (usually 45″/112cm, I’m still an unabashed quilting-fabric-for-apparel purchaser). This means I end up cutting my skirts on the cross grain. I have never had an issue interchanging the cross and the straight grain for my pattern pieces, though keep in mind I almost never sew with fabrics that stretch. If you’re sewing with something like cotton sateen, obviously you can’t have the stretch running up/down so you have to think more carefully about your pattern placement.
Cutting
I like my skirts around the 60cm/24″ length, so I end up needing about 130cm/51″ of fabric for a skirt (two widths of the fabric). Add on another 60cm/24″ for bodice pieces and that’s how I get dresses out of 2 metres/yards of fabric. But I recognise that this might not be your case, so you may have to reorganise your pattern pieces differently. Plus you may like a fuller skirt, in which case, you’ll have to go on the straight gain of your fabric. Get your skirt out of the way first for most patterns and see how much fabric you have left to work with for the bodice.
You should end up with three rectangles, two of them identical (your two back panels), and one of them being double the width (your front panel). Refer to the diagram above. Finish the edges any way you prefer before you start sewing anything together. I didn’t finish the edges on these except for in the back and along the hemline because I use the selvage of my fabric on the sides, but you can use any edge finishes you prefer, be they overlocking, pinking, or binding. You don’t need to finish the upper seam because it will hopefully be encased in your lining. French seams are cool too but the pocket instructions are completely different with french seams so that’s a whole ‘nother tutorial that we won’t discuss here.
Pockets
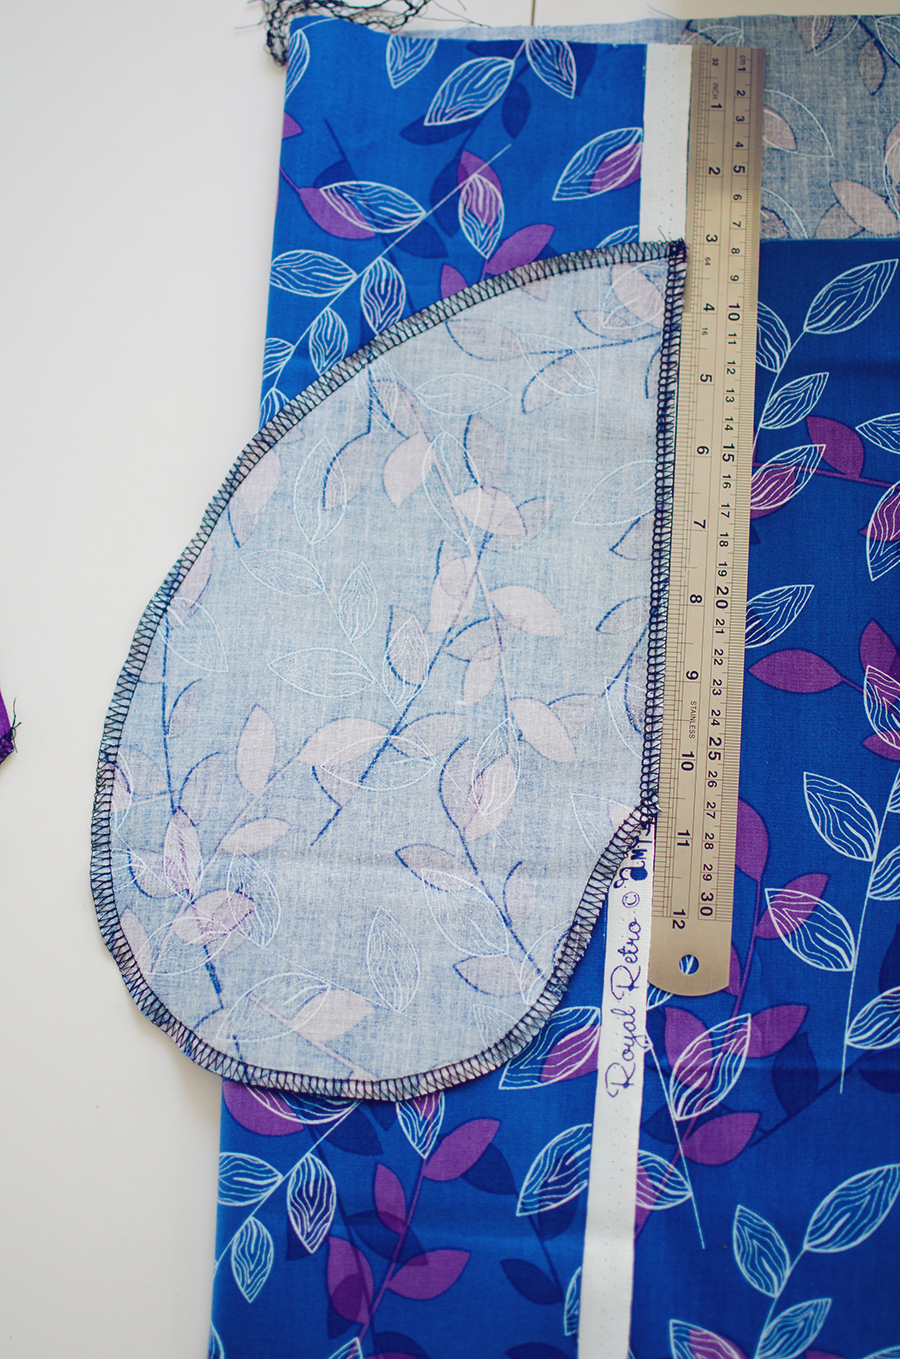
My favourite method of doing pockets is to construct them half out of lining fabric and half out of your fashion fabric. The lining fabric feels nice against your hands and it doesn’t add too much bulk in the area. The lining will always be attached to your front skirt panel, and the good fabric pieces attached to your back skirt panels, because they are the ones you’ll see when your pockets are flipped to the front.

Get your favourite pocket pattern pieces (you’ve got them, and if you don’t, you should always have them on hand) and trace them onto your fabric. Don’t forget to mirror half the pieces, whatever you do. I have wasted more fabric than I’d like to admit from such a stupid mistake.
Finish the edges of these individually and press.
Pin to your skirt pieces right sides together in the location where it is most comfortable to hold your hands. For some people this is higher, and for some, lower. The amount doesn’t matter as much as it matters to just be consistent on all your pattern pieces. So don’t pin 3 inches down from the waist on one piece and 7 down on another. You get my drift.
Sew a straight line from the top of the pocket to the bottom a little closer to the edge than your usual seam allowance.
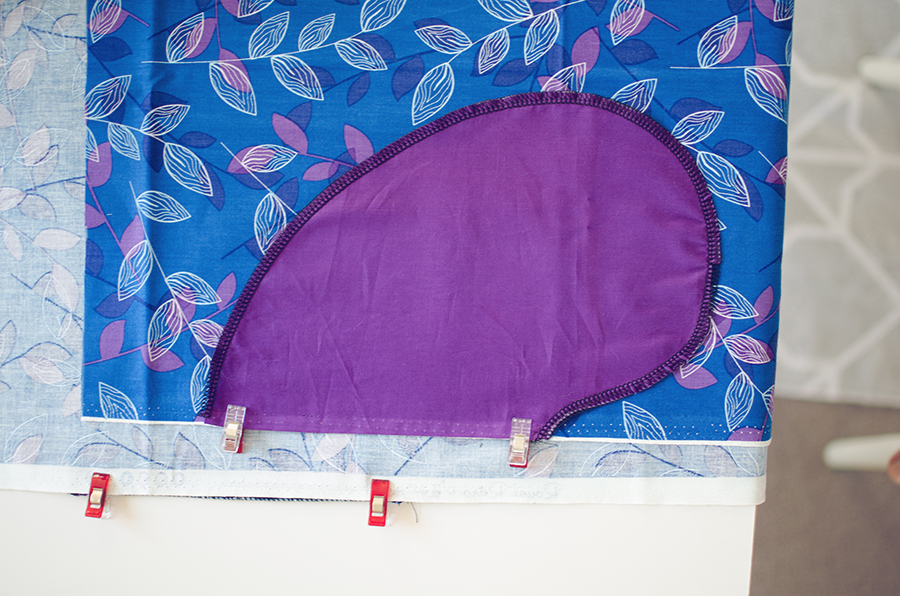
Flip your pockets out and understitch them. This step prevents them from trying to worm their way out as you’re using them throughout the day.
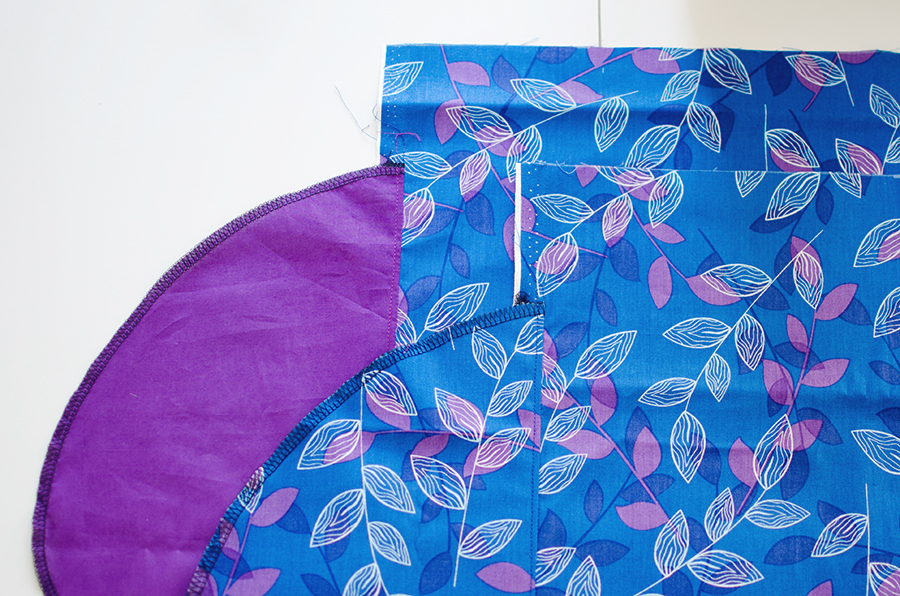
Now pin your skirt pieces at the sides, right sides together, and sew from the top of the skirt to the pocket, around the pocket bag, and continue back down the side. While you’re sewing, make sure that your pockets are well-aligned! You don’t want to accidentally sew them in a way that ends up with parts of them on the outside of the pocket.
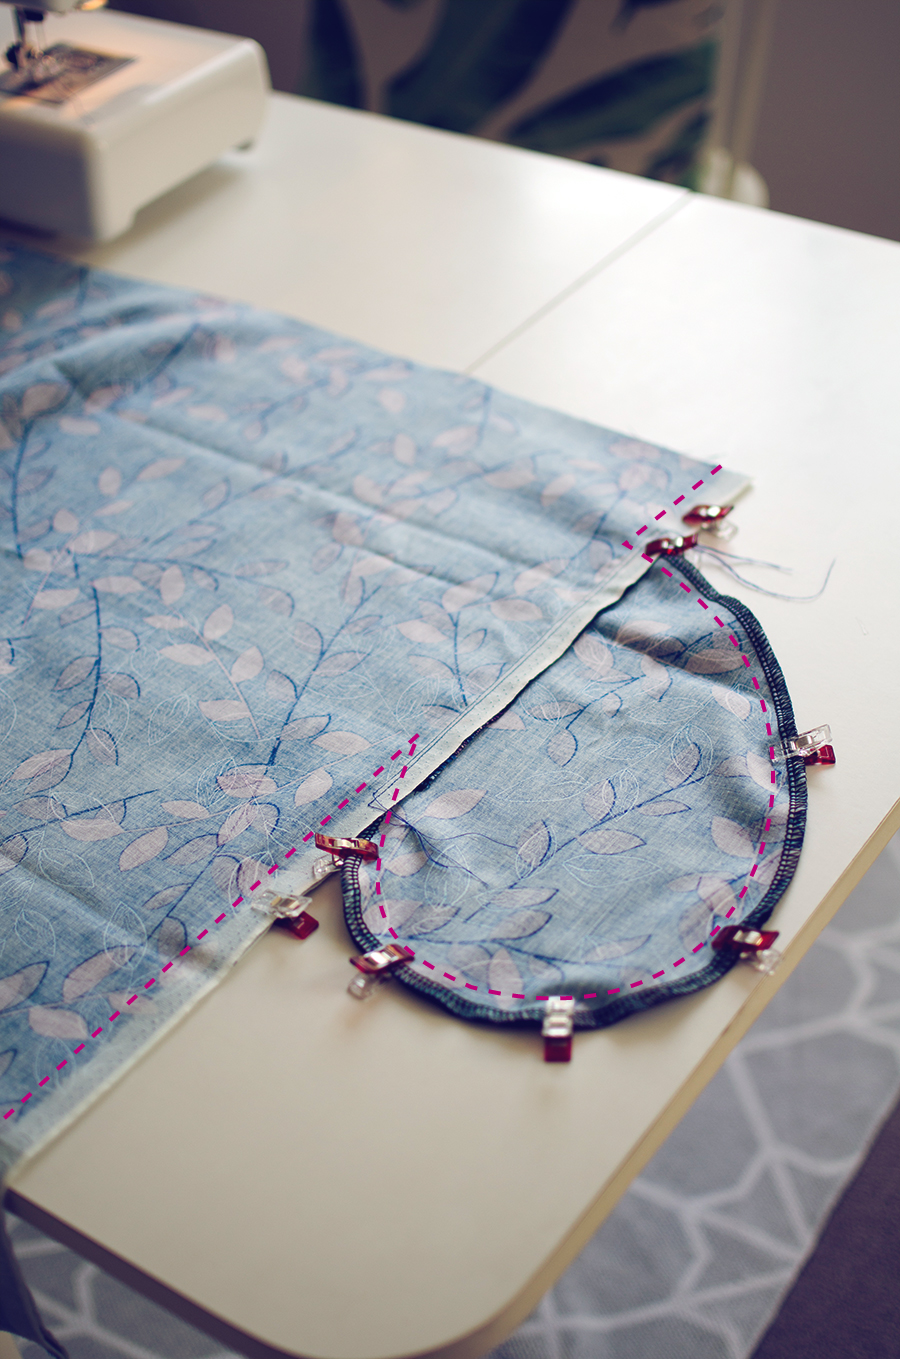
Press all your seams and test yo pocket.
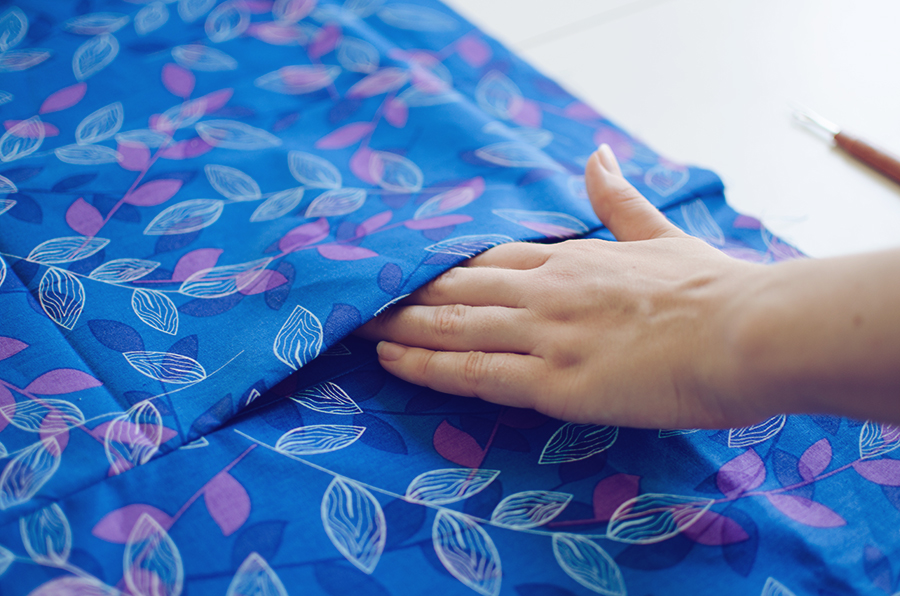
Piping
So I piped this dress and didn’t intend to include a tutorial for this because it’s so simple but here it is!
Adding piping is just sewing along your seam allowance. I trimmed my seam allowances for this so they lined up with the thickness of my piping. That way I could use the edge of the fabric as my guide, and the cord inside the piping would sit flush against the left inner side of the presser foot as shown in the photo below.
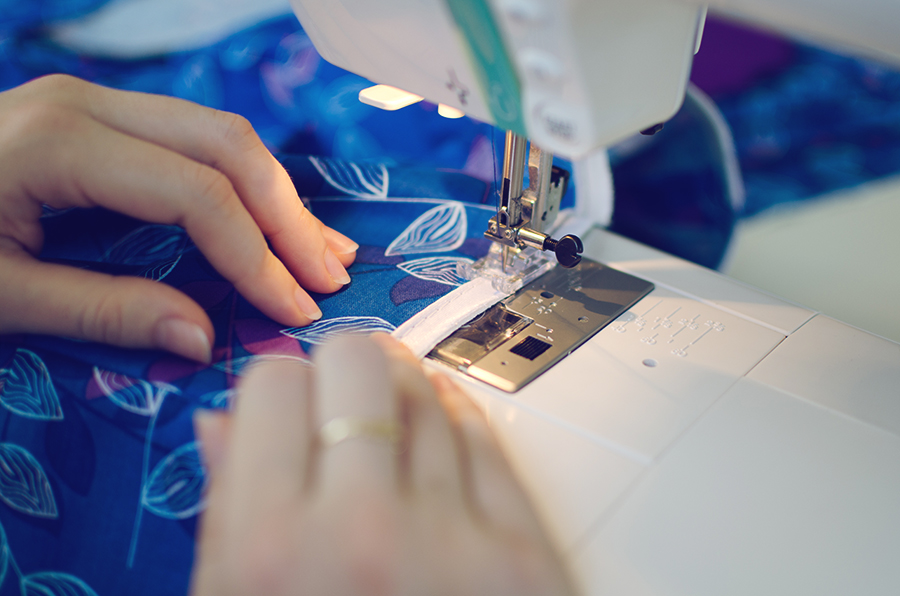
From there, you just stitch along the piping’s stitch, moving the width of your needle as necessary. The piping won’t move as you sew, I promise.
Gathering
There are several techniques for gathering. Some people can do it with one thread no worries, others need two (that’s me!) and some can do it by zig-zagging over a length of cord or dental floss. Whatever your method, the most important thing to ensure is that your gathers are neat and consistent. If you have trouble with keeping the gathers evenly distributed, make markings at intervals (1/4, 1/2, and 3/4 works well) and look for them when you gather your skirt.
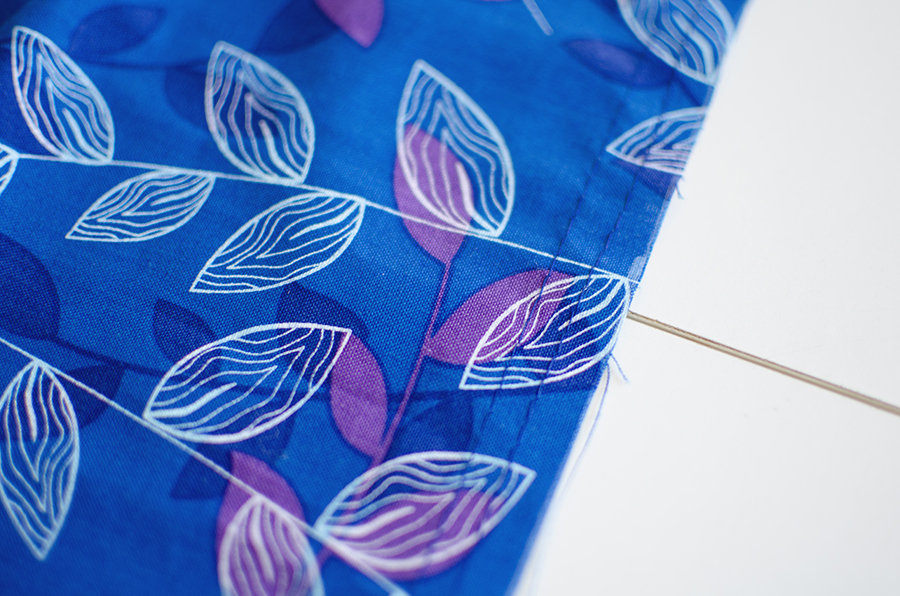
For my skirt, I sewed two rows of very long stitches from one edge all the way to the other, leaving long tails at the start and finish. Then I just pulled on both bobbin threads until my skirt was gathered an approximate amount. (No science here, ha)
The places where I use clips the most is with attaching skirts to bodices. I clip where the seams intersect on the sides, the back, and any markers I’ve made. I don’t know a quick way of doing this so I clip it on when I think it’s gathered enough and continue adjusting while it’s on the bodice so the gathers are flush with the bodice.

You want to hold the lining away for this step so it doesn’t get caught. Stitch your skirt to your bodice between your two rows of gathering. I started doing this with really full and heavy skirts because it was hard to keep gathers consistent if I sewed outside the rows of stitching and I would often get fabric I didn’t intend trapped in with my joining stitches. So now I do it this way and pull out the bottom gathering thread after it’s done for perfectly consistent gathers.
You’ll want to have your bodice facing up when you’re sewing your skirt to your bodice so you can exactly follow the stitches of your piping (if you included it). If you didn’t include piping, I still prefer to sew bodice on top of skirt instead of the other way around so I can smooth out wrinkles in the bodice before they turn into problems.

That was a quick lesson! The dress should really be taking shape now. In the next part, I will be showing you how to sew an invisible zipper using your regular old regular presser foot (the one I’ve been using for this whole tutorial).
I honestly haven’t seen a tutorial like the one I want to show you and I’m really excited to show you my method for fuss-free, perfect invisible zips, every time.