")
Alternative title: How to avoid hand sewing on the Butterick 6413 bodice.
Okay I lied, there’s a bit of hand sewing involved. But that’s not the point of this tutorial. Today I want to show you how easy it is to throw a pattern’s instructions out the window. For those of you who have already sewn your bodice using the pattern’s instructions, once you figure out how to get rid of the hand-sewn component, you’ll wonder how the writers ever came up with those wacky instructions.
Please note I don’t have anything against hand-sewing except when it’s unnecessary and won’t produce as nice a result. This is one situation where I strongly believe machine-sewing produces a faster, superior finish.
As usual, if you’re here from Facebook, welcome! And if not, please feel free to join us in the B6413 Sewalong group and post your works in progress, finished dresses, or even if you want to complain about my crappy instructions ;) Freely use the hashtag #b6413sewalong if you don’t feel like joining yet another Facebook group.
Let’s begin. We last left you with two perfect bodices, one shell and one lining. Now is the lesson on combining the two.
Attaching shell to lining
Our first port of call is stitching the lining to the bodice along the neckline.
(I’m re-using pictures, sue me)
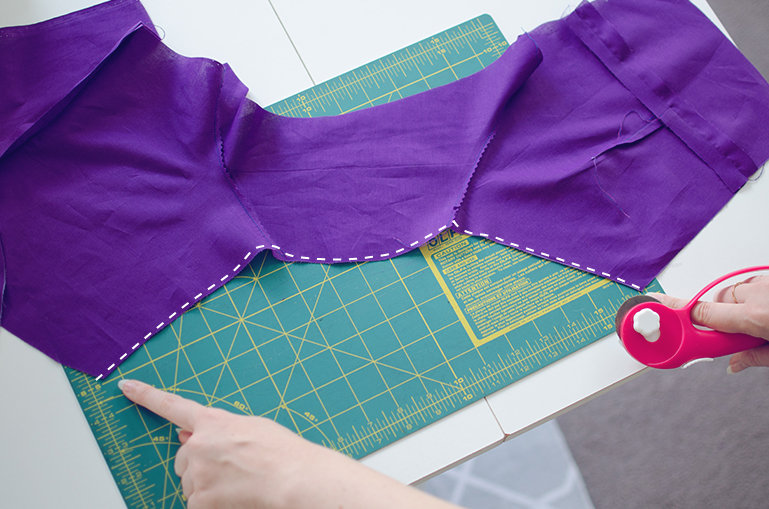
Use the regular seam allowance (5/8″ or 1.5cm) and attach your bodice pieces, right sides together, along the dotted line. Do this on both sides of your bodice. Press.
Now it’s time to understitch. This part is still necessary even though you trimmed for turn of cloth. If you’ve never understitched, it’s basically pushing both seam allowances over to the side of the lining and stitching it onto the lining side.
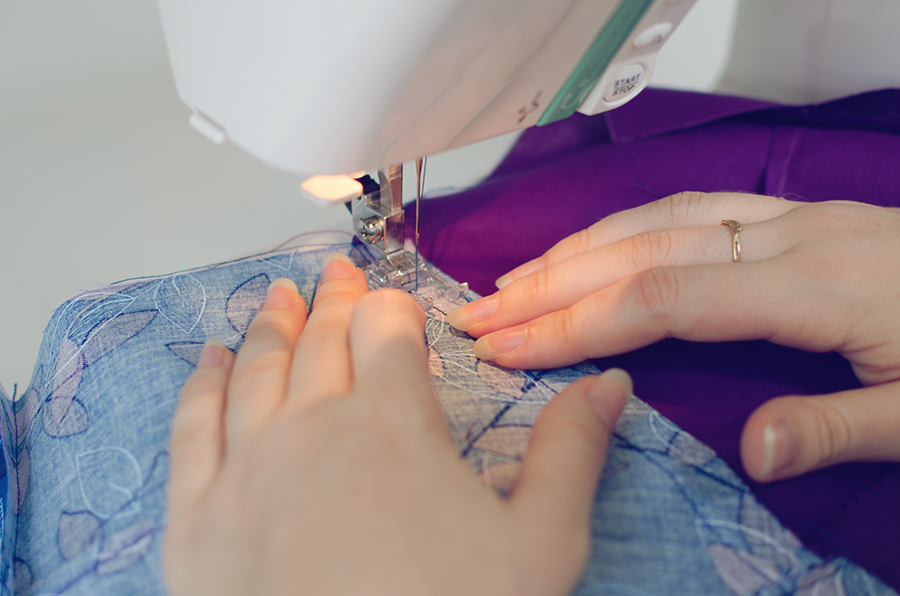
As you can see by the picture below, this is what your stitches should look like on the right side.

Do the same to the sleeves. (Let me reuse this image too)
Press, but don’t bother understitching this area. You’ll see why soon.
The keyhole
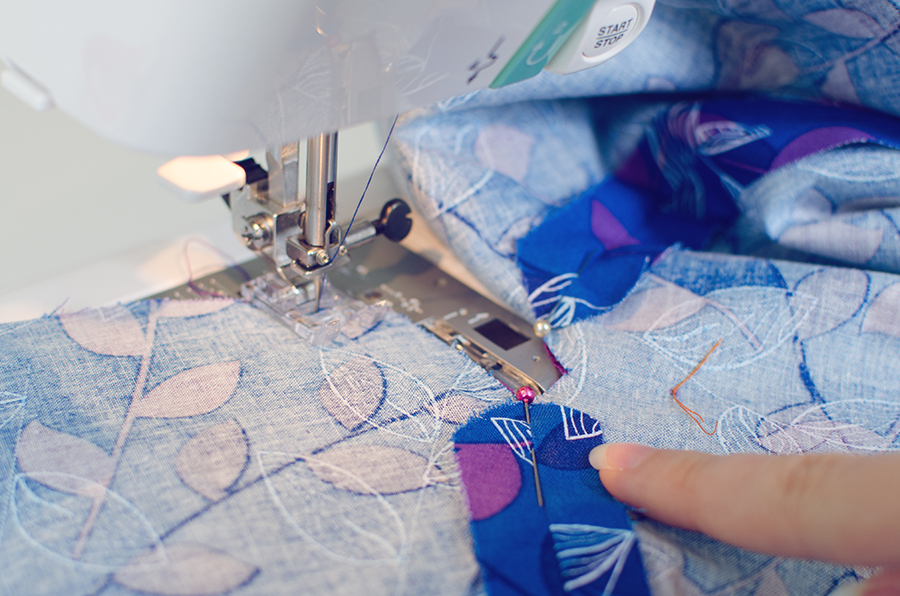
You will need to digest this carefully. This is a make-or-break moment for success with your no-hand-sew bodice, so be absolutely meticulous!
Right sides together, slide your pin into the bodice at the points shown below. You are inserting them perfectly into the seams and through to the lining’s seams on the other side. This is one of the few times I use my pins, to make sure that my seams are perfectly aligned when joining them together Make sure the pins are going through the seams on both sides and you should have no problems.
Similarly, make a tailor’s tack on that little circle you’ve marked onto your bodice which signals the bottom point of the keyhole. This tailor’s tack may want to be a bit tighter for better accuracy, so just knot it so it doesn’t come out.
I am holding down the edges here with clips, but you can use pins.
Now you can begin stitching. Stitch in reverse from the seamline to secure your stitch and then follow the shape of the keyhole.
Make sure you pivot at the seamlines and the tailor’s tack. I won’t tell if you have to rip it out and do this a few times in certain places to make it perfect, but you’ll want to be fairly precise. I recommend you reinforce the corners with an added row of stitching, just to be safe.
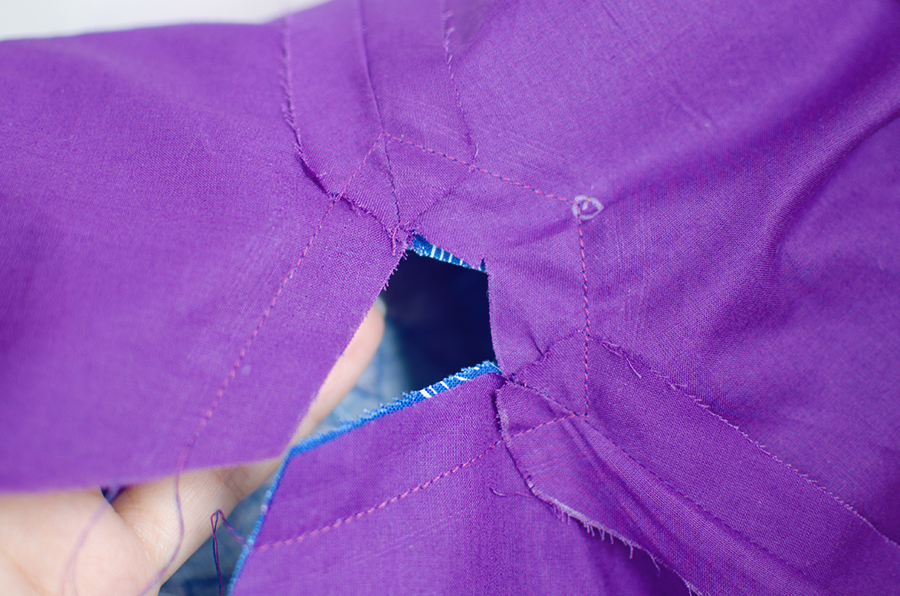
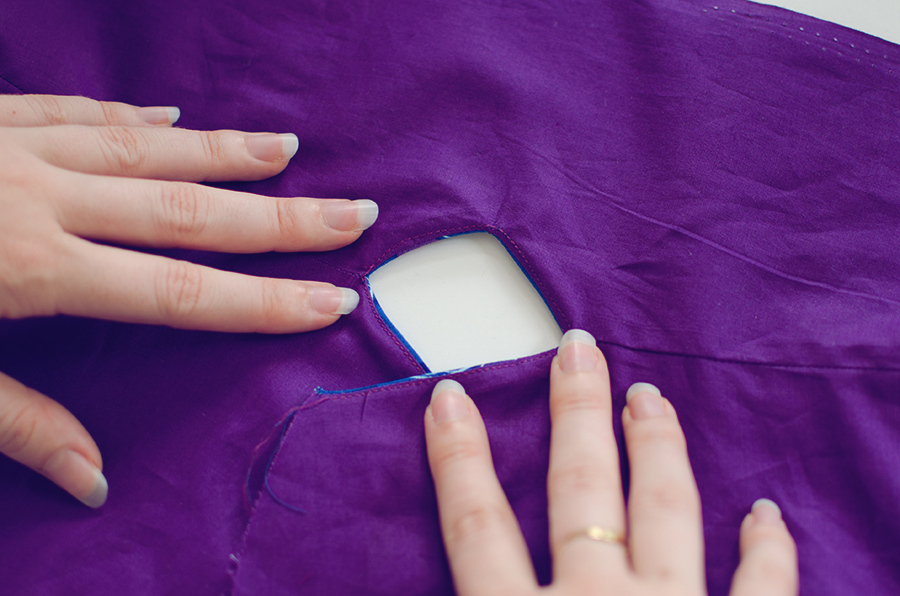
Look at how pretty and neat this stitching is. You want it to look like that on both sides.
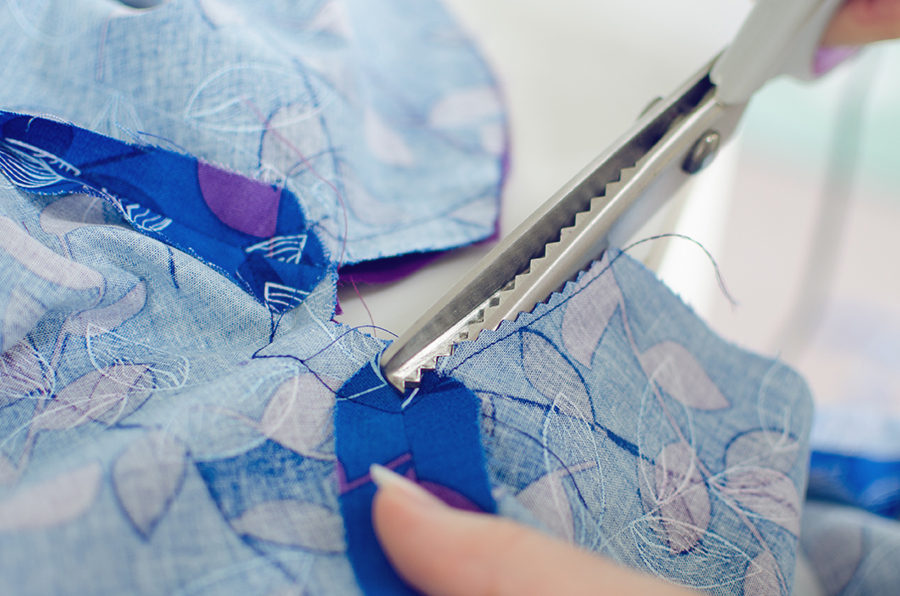
Snip, snip, snip those seam allowances off. Pinking shears are great for this but otherwise you can just trim and then clip to the bottom corner of the keyhole.
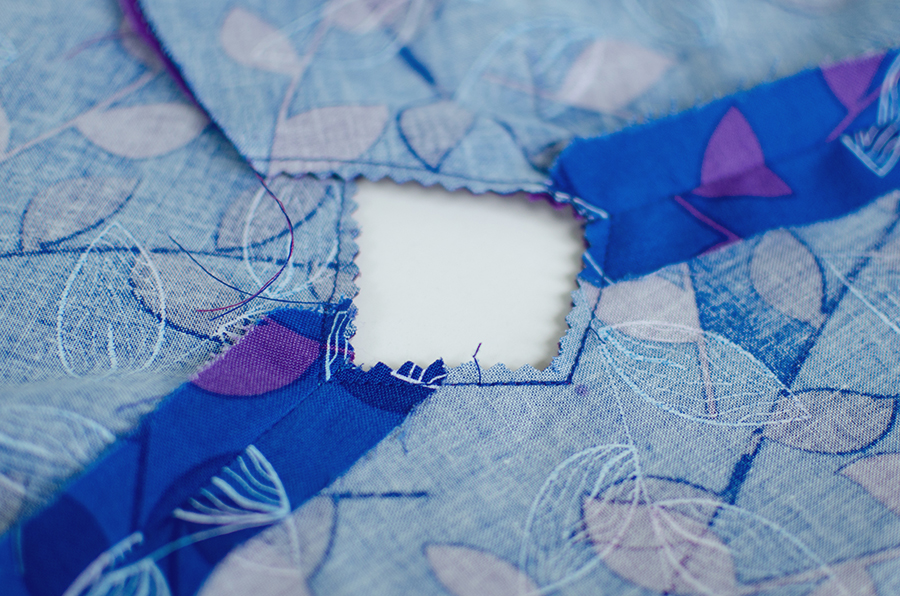
Flip your lining out to press it. You should have the prettiest keyhole ever. At this point, I actually understitched around the edge of the keyhole, which I won’t show the process of, because it was messy and you can hardly tell what I was doing. Understitch the same way you would your neckline, making sure to stay close to the edge.
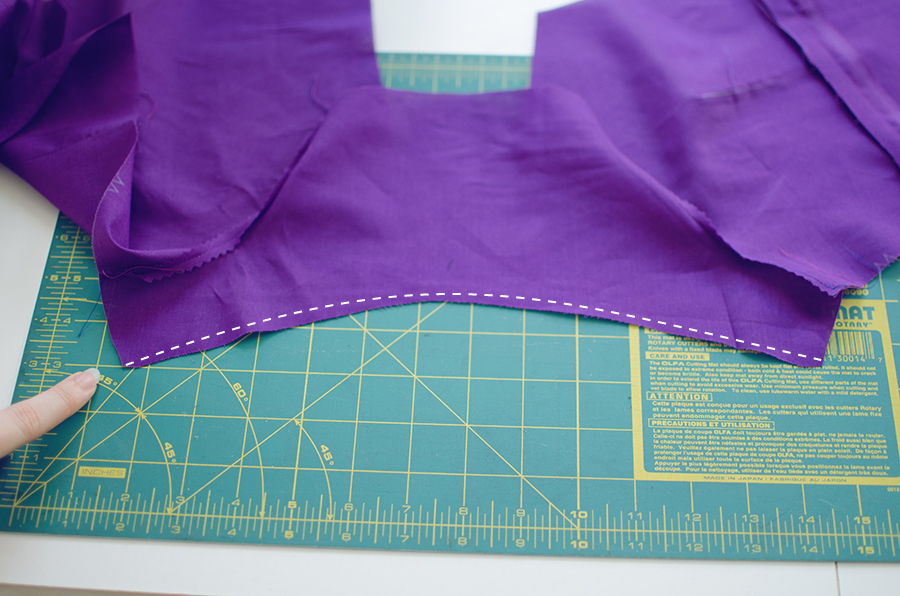
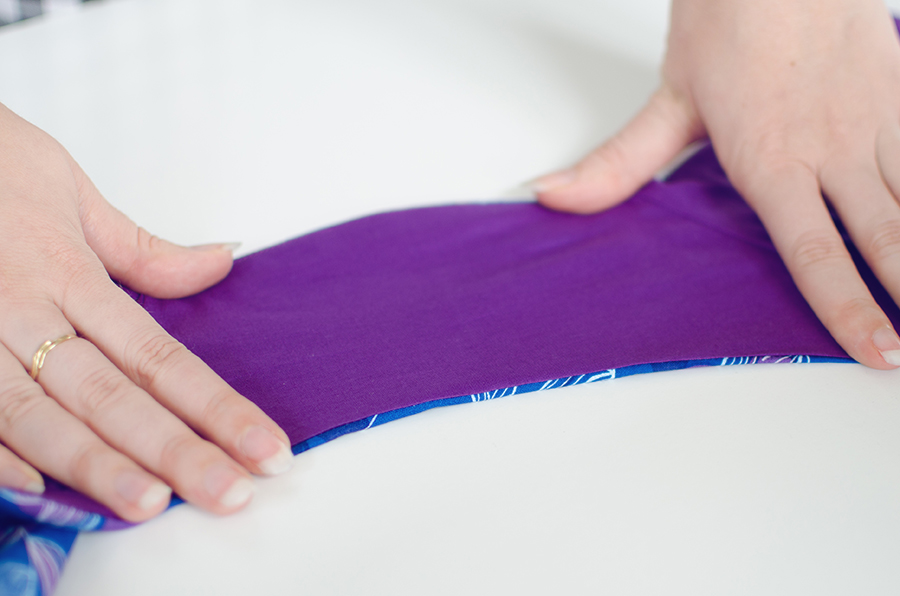
Press EVERYTHING. When you press your armhole, make sure you keep the lining and the shell flat and have the shell rolled up slightly to the inside of the dress. This will help keep everything flat and as you can see below, there’s a few millimetres of shell rolling over to the lining side which is why I said topstitching is unnecessary here. This is a perfect example of turn of cloth and it will never flip back over.
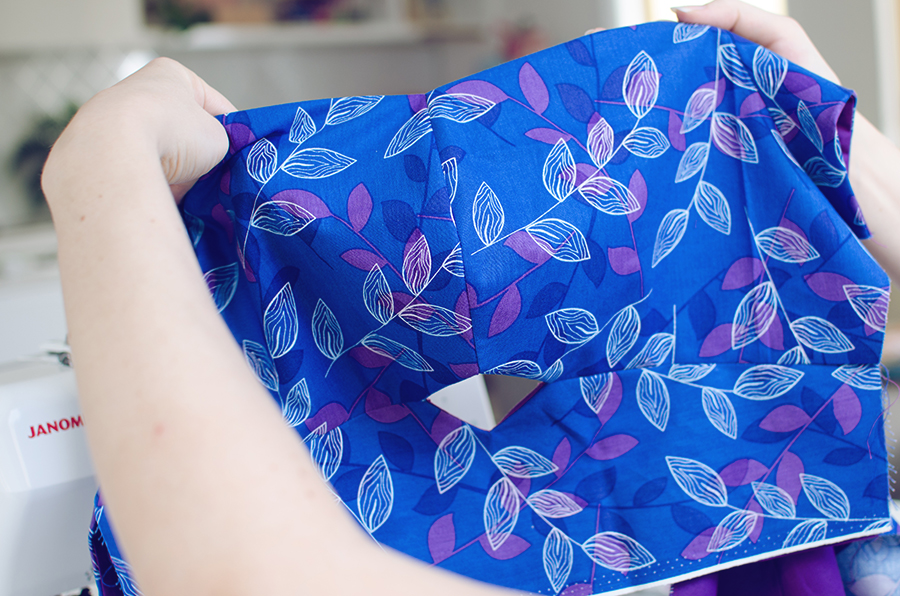
Connecting the bust pieces
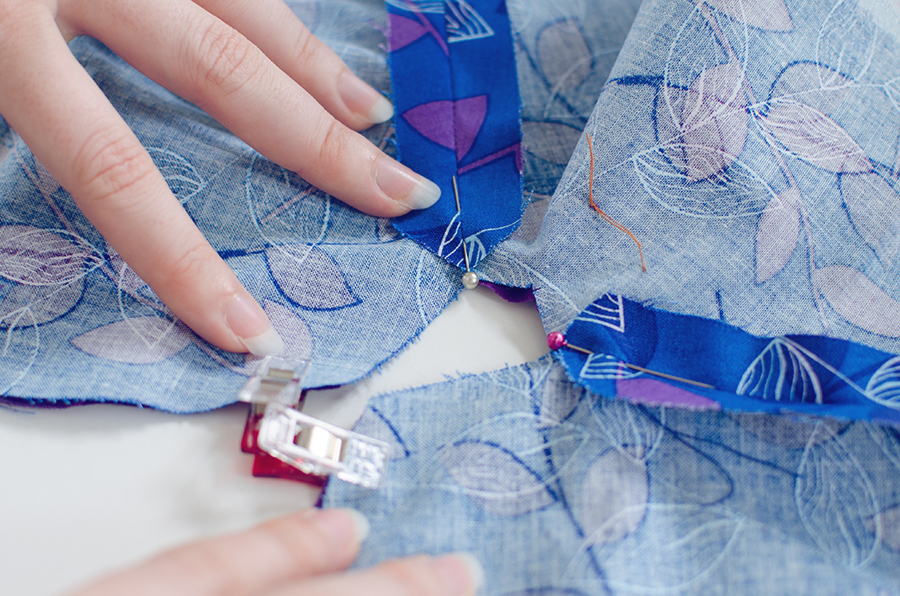
I realised halfway through how annoying this is to illustrate (it’s not hard, but not intuitive, if that makes sense) so I made a gif of it to help. But at this point, you will have two loose tubes for the front of the bodice, just.. flapping about, totally unsecured. Put them right sides together (shells touching, linings to the outside), as shown below, and clip or pin only the shell fabric together. If you pin the lining to the shell, this won’t work.
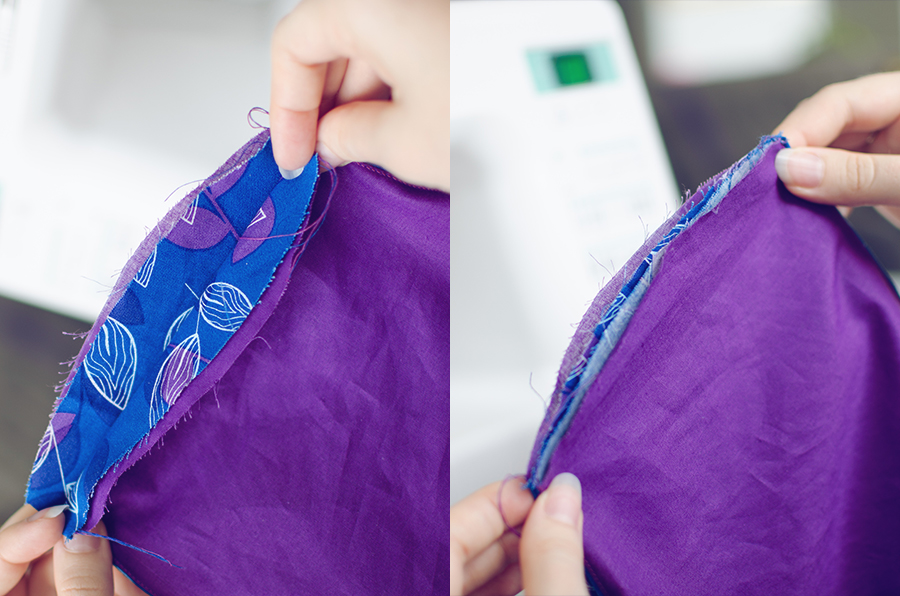
As illustrated below, reach into the bodice through the opening at the bottom/side of your bodice and flip this whole area inside out. So your linings will be touching and your shells will be touching and there’s a hole in the middle. I fumble a LOT in the middle like an idiot trying to straighten the rest of the fabric, but if I hadn’t fumbled, this would have taken but a second.

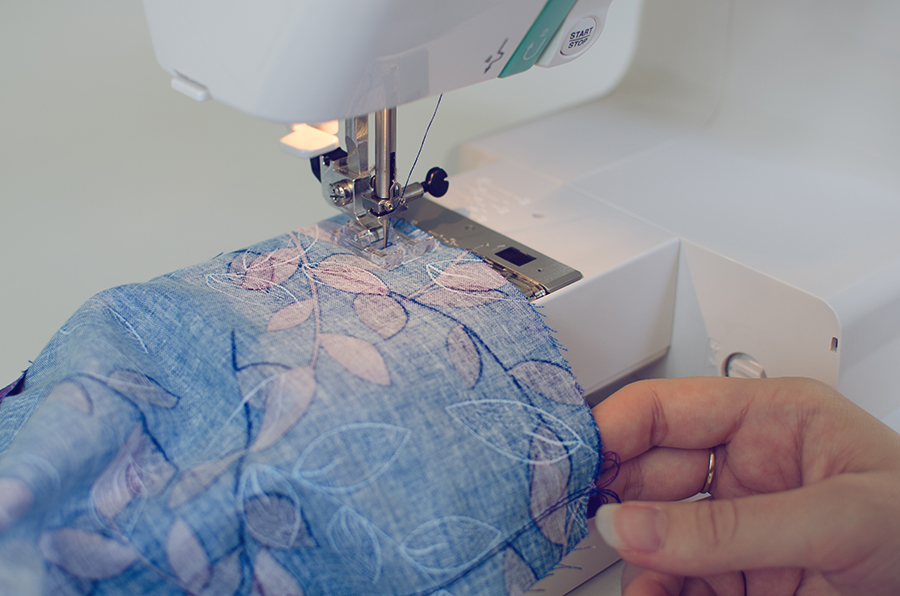
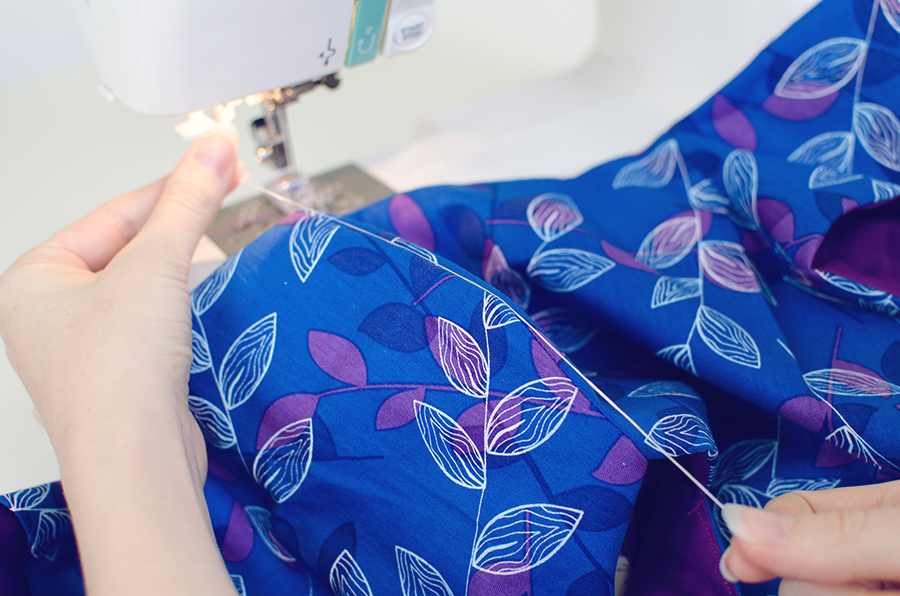
Now that you have a tube, take the thingy (technical term) off your sewing machine, and slide it onto the arm. Sew all the way around as though you were sewing a slightly more cooperative sleeve, making sure to match seams (you’ll see the seam where my thumb is in the below picture; it should match the lining’s seam).
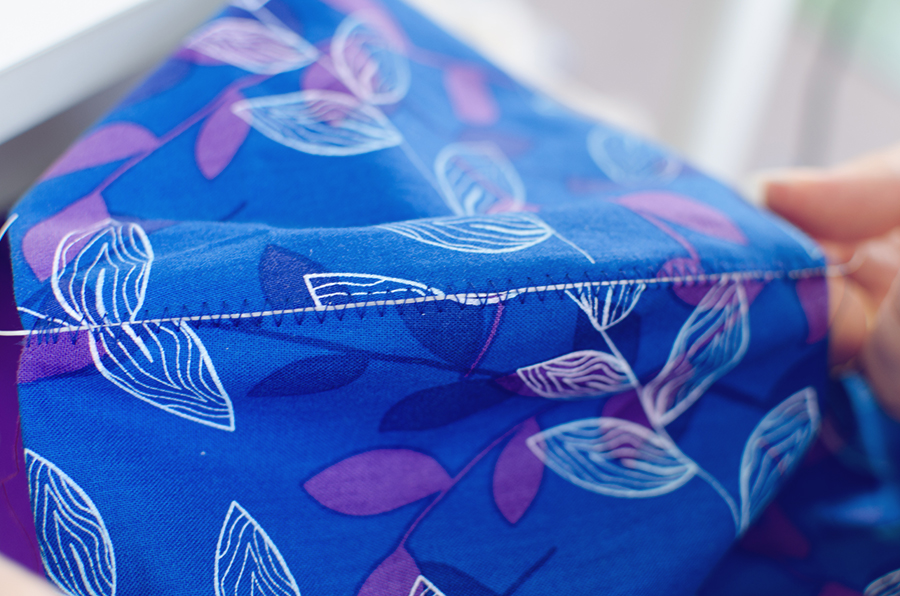
Step back and admire. What a pretty seam you made.

When you turn it out, it’ll look funny and uni-boobish, but if it looks anything like the below, you’re going good, son.
The bow
I normally don’t use this technique for gathering because I don’t like how easily my gathers slide, but that’s the reason why it works so well here!
Get some dental floss or cording, and measure out a piece that works. In this example, I’m using one piece, but you may find better results with two rows.
Zig-zag over your cord being sure not to accidentally pierce it with the needle or that won’t work well at all. Leave some long strings at the start and the finish because you’ll tie your cord to that when you’re done gathering.
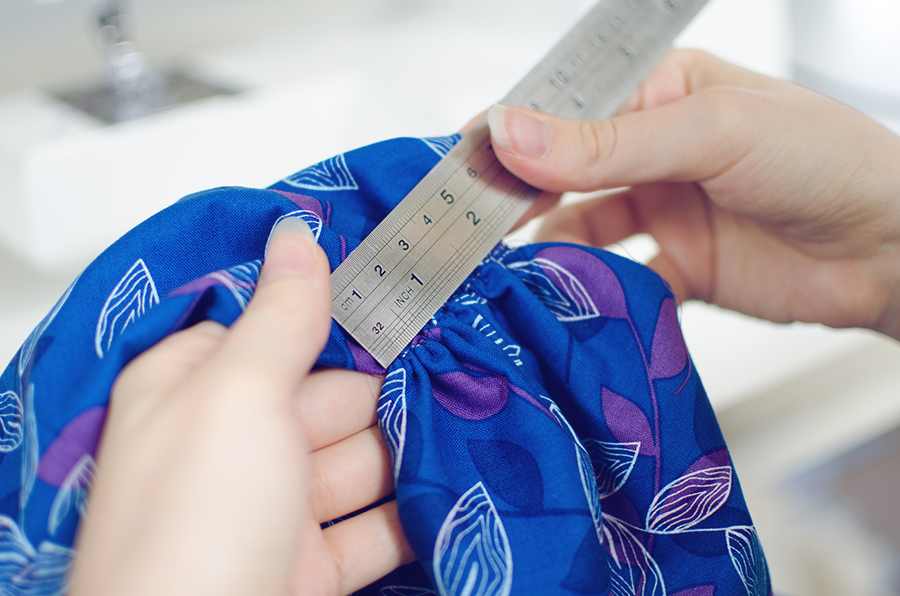
Making sure something is anchoring the other end, start pulling your fabric up your cord into a gather.
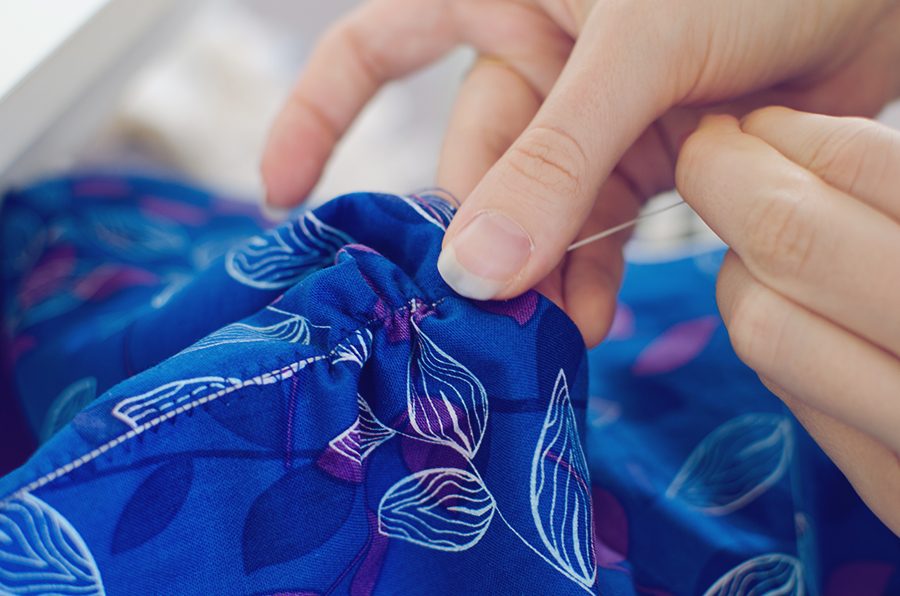
The pattern specifies 2 inches of gathering, but if you want the neckline to be higher, you can go above this. I feel like it would be incredibly hard to get it any more compressed than 2 inches, but you could try if you wish! I tied the cord to the strings that trailed off from my zig-zag stitch.
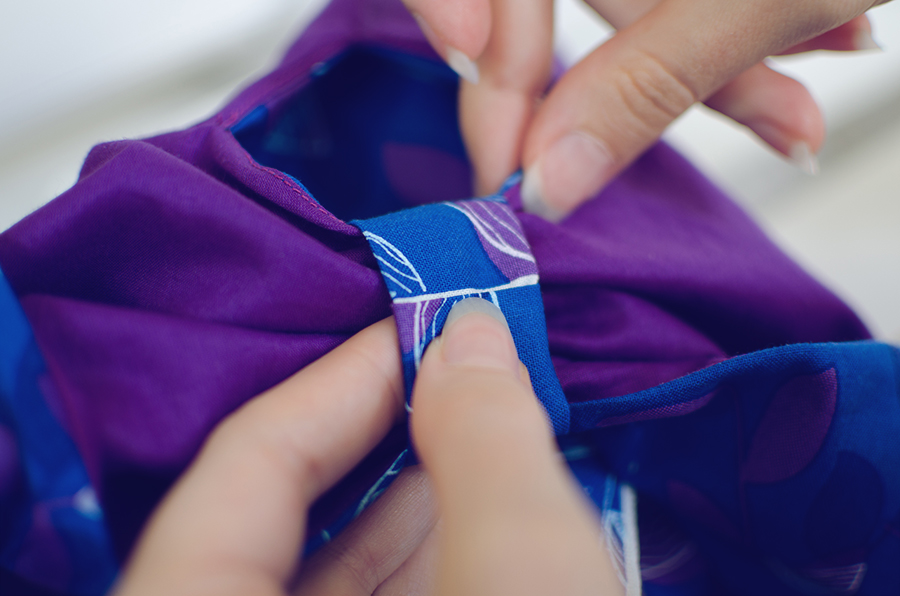
Grab your prepared loop we created in the previous tutorial and tuck in the seam allowances into the tube on one end. Then slot the other end into it to form a continuous loop and slip stitch this together. It doesn’t really matter what stitch you use since this side won’t be seen.
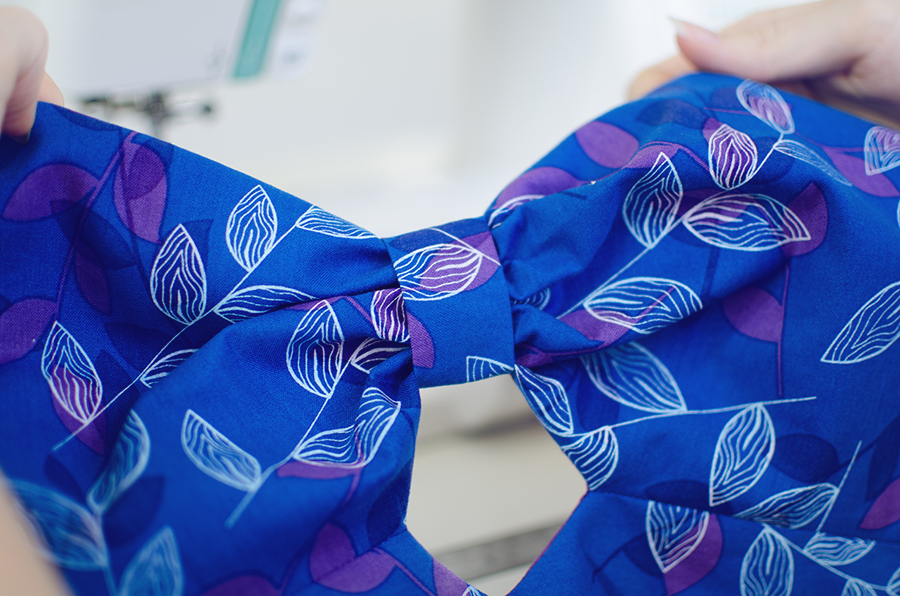
This is what it will look like from the outside. You won’t be able to see any cording.
Sewing the sides
Pin the sides of your bodice right sides together, shell together, and lining together, and use pins to mark your seamlines similar to what we did for stitching around the keyhole, so that the seams are matching on both sides. If you’ve ever wondered how people manage to perfectly match their seams, this is the way they’ll do it!
Start from the waistline of the shell and keep stitching until you reach the waistline of the lining (or vice-versa), there should be no stopping.

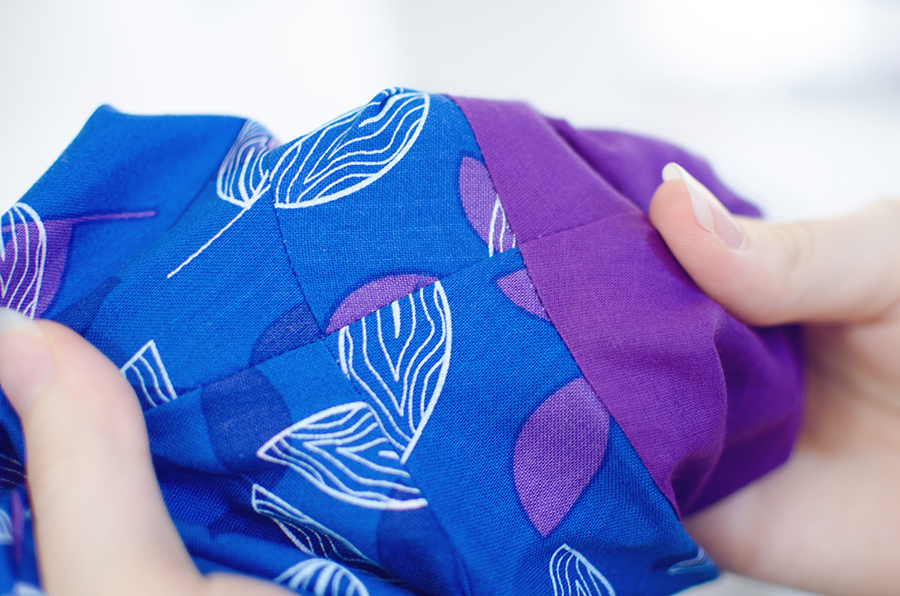
Press thoroughly and voila. Perfectly matched seams.
Conclusion
So there, that’s all there is to eliminating the hand-stitching component from the bodice! I hope that even if you’re not sewing along with us and you’re just peeking in for curiosity’s sake, if nothing at all, this sewalong teaches you that sometimes the pattern instructions are not God’s Word and you can get things done better and more cleanly by following your intuition.
Once you learn how to construct the pieces in your head, you may never need to follow the instructions ever again.