You’re in the home stretch now!
At this stage of the B6413 Sewalong, you should have your zipper inserted and everything else basically done. The only thing that will be left to do is to hem your dress and close your dress’ lining.
Hem
There are several schools of thought about hemming. Some say you should always measure from the ground-up. This is a great method for circle skirts, especially when you have a helper or can be bothered with convoluted methods like a chalked piece of string strung across a doorway, etc. Since we are doing a rectangle dirndl skirt, it should be fine to just consistently measure from the waist to the where you want your hem. Note: You don’t need to wait 24 hours for the hem to drop on these kind of skirts, only when you’ve cut your skirt on the bias, like circle skirts, etc.
Use a ruler and make little marks along the edge of your fabric with your chalk/pen/whatever to indicate the depth of your hemline. Fold at these marks and press the folded edge with your iron to set the hemline so it doesn’t move as you’re stitching. You can also put some pins or clips every so often to help you sew your hem. I do this every 10cm or so so it doesn’t get in my way too much while I sew.
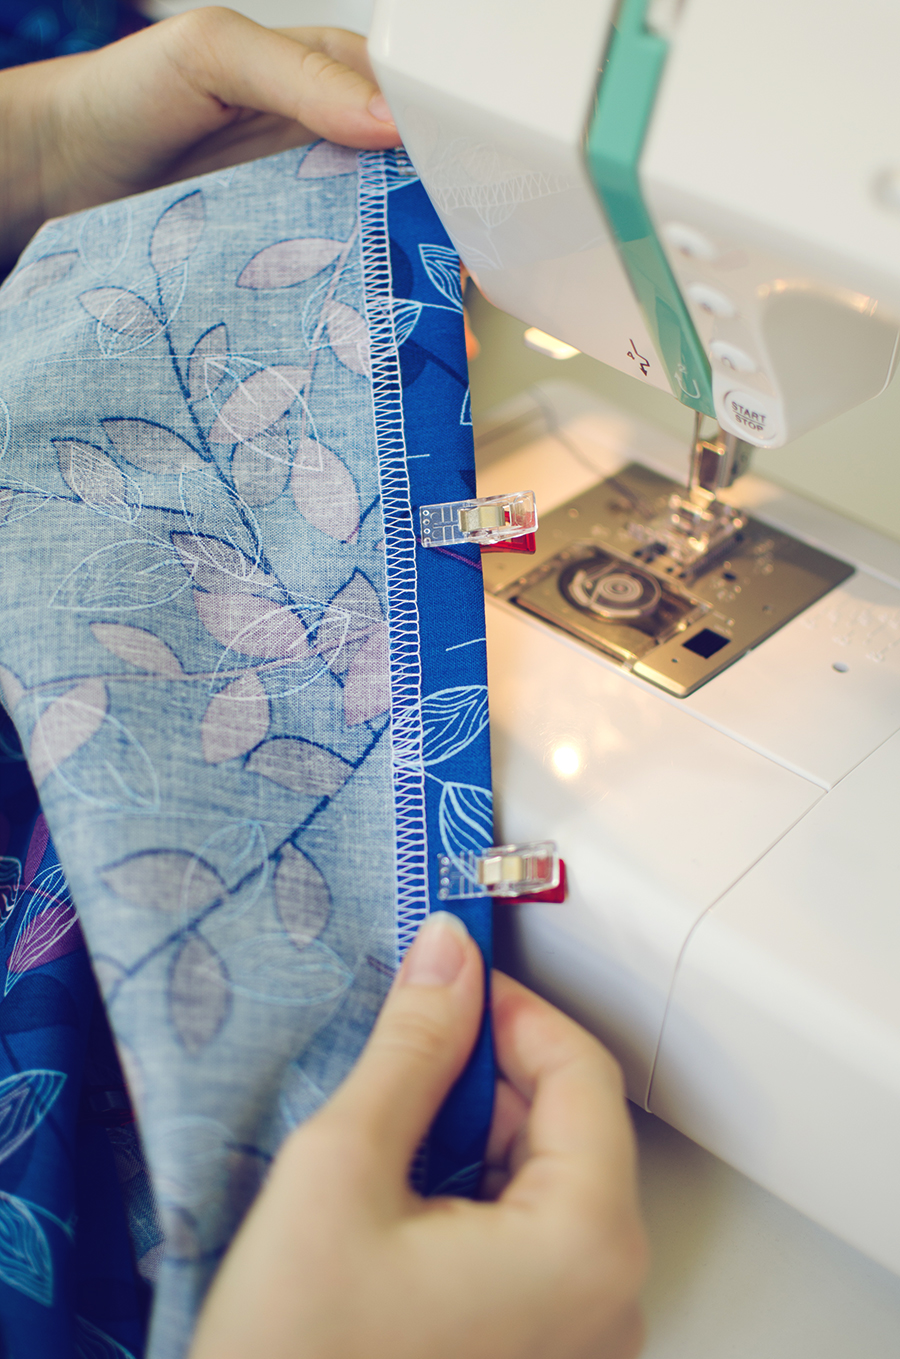
I then folded the hem back so I can see the other side of the overlocker stitches and use an invisible hem stitch on my machine to sew along the exposed overlocked edge, making sure that the extra-wide stitches (shown below as points, like a pyramid) catch the folded fabric.

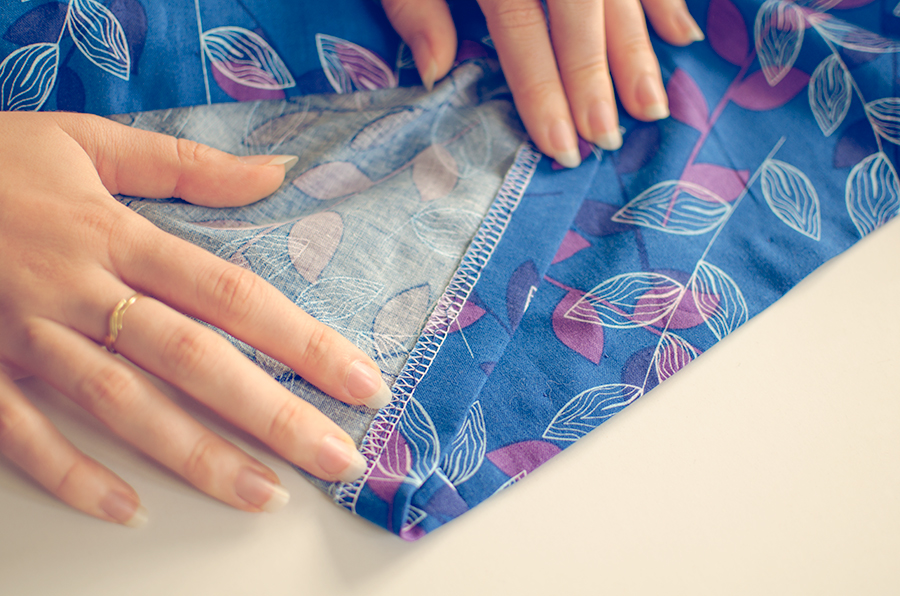
Now these little areas that catch the front of the skirt should only just be visible on the right side. They will look like single stitches. I didn’t even have a thread that matched the fabric very well and they still turned out pretty darn invisible.
There are so many different ways to hem this that I feel like it would be a disservice to only guide you on one. So here’s a brief list of the ways you can hem this dress:
- Rolled hem
- Narrow hem
- Regular stitched hem
- Bias bound hem
- Bias faced hem
- Invisible hem
You get the picture.
I did a machined invisible hem because they’re quick and neat, but there are dozens of different ways you can hem. Yes, you can hand-sew this area too, if you really really want. There’s no one best solution and you can get really creative with this and I don’t need to rewrite the book on hems here.
Lining
You have two options here, machining or sewing by hand. While I normally hate hand sewing, I prefer this method because it’s neater and honestly doesn’t even take that long. For those who truly want this whole project to be a “hands-free” exercise, I’ll explain both ways.
Machining
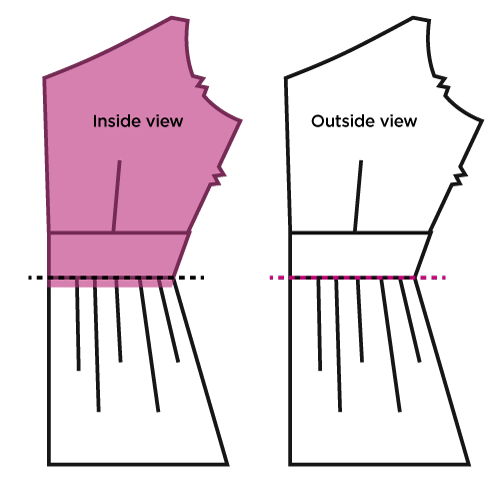
Tuck the lining up inside the dress and only let a little bit of the folded edge fall beyond the waist seam. Secure it with pins, tacks, or glue (pick your poison) and stitch in the ditch in the seam between the bodice and skirt from the outside. In the diagram below, imagine the pink area is your lining. I exaggerated how much of the folded edge should fall over the waistline for illustrative purposes, but you can make it as small or big as you want within reason.
If you’re lucky, it will look nice and neat, but I find it hard to predict what the lining will look like with this method. You might find some sections where you will just catch the lining with your stitches and other sections where you might miss it entirely, so your results may vary.
This is not the neatest method and your insides will have a visible stitch running across the bottom of the lining. But I guess you can’t see a difference from the outside, so if you choose to do that, it’s not like anyone but you will be able to tell. (If you’re like me, you will just suffer psychological consequences when doing this.)
Personally, I’m really fastidious about the inside appearance of my dresses, so I chose to slip-stitch the lining by hand. I recommend you do it this way too if you’re concerned about the inner appearance of your dress.
Slip-stitching
Slip-stitching may be tedious, but it honestly doesn’t take very long if you avoid making your stitches too close together. There doesn’t actually have to be a lot of structural integrity with your lining because the bulk of the weight will be held by the shell of the dress. Yay!
So, looking at the inside of the dress, fold the lining inward at the lower seam allowance, making sure that the upper edge of your skirt is tucked inward. Everything should be encased by the lining. Pin together in as many or few places as you wish, but take extra care to align your lining against your shell in certain places–side seams, darts, and centre front.
Using a hand sewing needle and some thread, secure the corners down to the zipper and sew along the seam allowance, catching just the lining and the stitches that are attaching your skirt to your bodice. This will prevent you from accidentally making visible stitches on the outside of the dress.
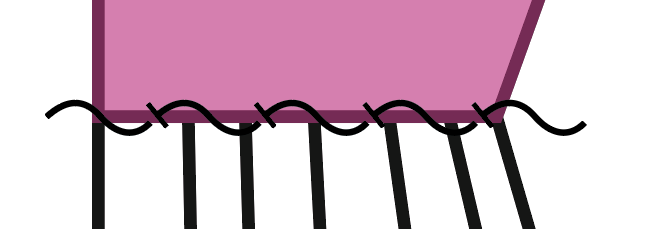
It’ll look vaguely like this. You’re catching the lining and the shell fabric in one movement, then the next spot half an inch down, then the spot place half an inch down, and so on. You can make the gaps between stitches smaller or larger but I am lazy so I make larger stitches.

After you’ve secured your lining all the way around, you’re officially done!
Don’t forget to use the #b6413sewalong tag on Instagram for finished makes or post to the official B6413 Sewalong Group on Facebook so I can see your marvellous creations and help you in areas that you’re stuck.
If you’ve enjoyed this series and want me to make any more, please follow me on Facebook or Instagram and tell me what you want to see! It’s no fun making tutorials and sewalongs for people who don’t use them, and it gives me great joy to be able to help people out with their sewing dilemmas. It’s only due to the amazing support of my readers that I am inspired to make tutorials and sewalongs like these, so if you enjoyed yourself, please give me some love!
Happy sewing adventures!
2 Comments
Just a quick question about this pattern. It looks like in the instructions that you cut a double thickness for the front bodice piece. I’m a wee bit confused. What exactly does this mean? My brain isn’t connecting why we would cut two each for main and lining for something that only needs one and one. Do I use both of each to create stiffness? Or am I just way off track… Could you dissect this a bit for me?
Thanks in advance!
If I understand your question the way I think I’m reading it, you cut two because one bodice front is the left side and the other is the right side :)